m (Filling in some more effects values) Tag: Visual edit |
m (→List) Tag: Source edit |
||
| (22 intermediate revisions by 10 users not shown) | |||
| Line 1: | Line 1: | ||
| + | |||
[[File:Accessories_Button.png|thumb]] |
[[File:Accessories_Button.png|thumb]] |
||
Accessories are items which can be equipped to a Kamihime to boost her Attack and HP, and give other advantageous effects such as increased double attack rate or increased defense. In order to use accessories the player must be rank 20 or higher. |
Accessories are items which can be equipped to a Kamihime to boost her Attack and HP, and give other advantageous effects such as increased double attack rate or increased defense. In order to use accessories the player must be rank 20 or higher. |
||
| Line 20: | Line 21: | ||
* '''Sunday:''' Each stage of the quest will have a random element. |
* '''Sunday:''' Each stage of the quest will have a random element. |
||
| − | There are also a few places in the [[Shop]] to exchange various currencies for accessories. This includes Accessory Points, obtained by |
+ | There are also a few places in the [[Shop]] to exchange various currencies for accessories. This includes Accessory Points, obtained by selling accessories. |
{| class="BandedRows" style="width:auto;" align="center" cellpadding="5" |
{| class="BandedRows" style="width:auto;" align="center" cellpadding="5" |
||
|+Accessory Points |
|+Accessory Points |
||
|- |
|- |
||
| − | ! Rarity |
+ | ! Rarity !! Sell Value |
|- |
|- |
||
| − | | {{Icon|n}} || |
+ | | {{Icon|n}} || 50 |
|- |
|- |
||
| − | | {{Icon|r}} || |
+ | | {{Icon|r}} || 50 |
|- |
|- |
||
| − | | {{Icon|sr}} || |
+ | | {{Icon|sr}} || 100 |
|- |
|- |
||
| − | | {{Icon|ssr}} |
+ | | {{Icon|ssr}} || 250 |
|} |
|} |
||
| Line 56: | Line 57: | ||
|- |
|- |
||
| {{Icon|ssr}} |
| {{Icon|ssr}} |
||
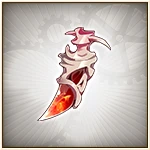
| − | | [[File:Corona Fang.jpg|50px]]<br />5x [[ |
+ | | [[File:Corona Fang.jpg|50px]]<br />5x [[Fang]] |
| [[File:Prison of Fire, Idea Core.jpg|50px]]<br />5x [[Prison Idea Cores|Idea Cores]] |
| [[File:Prison of Fire, Idea Core.jpg|50px]]<br />5x [[Prison Idea Cores|Idea Cores]] |
||
| [[File:Holy Crystal of Light.jpg|50px]]<br />10x Holy Crystal of Light |
| [[File:Holy Crystal of Light.jpg|50px]]<br />10x Holy Crystal of Light |
||
| Line 81: | Line 82: | ||
|- |
|- |
||
| {{Icon|ssr}} |
| {{Icon|ssr}} |
||
| − | | [[File:Corona Fang.jpg|50px]]<br />10x [[ |
+ | | [[File:Corona Fang.jpg|50px]]<br />10x [[Fang]] |
| [[File:Prison of Fire, Idea Core.jpg|50px]]<br />10x [[Prison Idea Cores|Idea Cores]] |
| [[File:Prison of Fire, Idea Core.jpg|50px]]<br />10x [[Prison Idea Cores|Idea Cores]] |
||
| [[File:Holy Crystal of Light.jpg|50px]]<br />20x Holy Crystal of Light |
| [[File:Holy Crystal of Light.jpg|50px]]<br />20x Holy Crystal of Light |
||
| Line 126: | Line 127: | ||
! Icon !! Base !! Max lvl !! Cap !! Normal !! Ancient !! Devil |
! Icon !! Base !! Max lvl !! Cap !! Normal !! Ancient !! Devil |
||
|- |
|- |
||
| − | | rowspan=" |
+ | | rowspan="3" | {{Icon|atk_up|40}} || +2% ATK || +3% ATK || rowspan="3" | 40% || <span style="color:green;">'''✓'''</span> || <span style="color:green;">'''✓'''</span> || <span style="color:green;">'''✓'''</span> |
|- |
|- |
||
| +3% ATK || +4% ATK || <span style="color:red;">'''✗'''</span> || <span style="color:green;">'''✓'''</span> || <span style="color:green;">'''✓'''</span> |
| +3% ATK || +4% ATK || <span style="color:red;">'''✗'''</span> || <span style="color:green;">'''✓'''</span> || <span style="color:green;">'''✓'''</span> |
||
| ⚫ | |||
| + | | +4% ATK || +5% ATK || <span style="color:red;">'''✗'''</span> || <span style="color:red;">'''✗'''</span> || <span style="color:green;">'''✓'''</span> |
||
|- class="even" |
|- class="even" |
||
| rowspan="2" | {{Icon|ability_up|40}} || +3% Ability Damage || +5% Ability Damage || rowspan="2" | ? || <span style="color:green;">'''✓'''</span> || <span style="color:red;">'''✗'''</span> || <span style="color:red;">'''✗'''</span> |
| rowspan="2" | {{Icon|ability_up|40}} || +3% Ability Damage || +5% Ability Damage || rowspan="2" | ? || <span style="color:green;">'''✓'''</span> || <span style="color:red;">'''✗'''</span> || <span style="color:red;">'''✗'''</span> |
||
| Line 152: | Line 155: | ||
| +4% DEF || +5% DEF || <span style="color:red;">'''✗'''</span> || <span style="color:red;">'''✗'''</span> || <span style="color:green;">'''✓'''</span> |
| +4% DEF || +5% DEF || <span style="color:red;">'''✗'''</span> || <span style="color:red;">'''✗'''</span> || <span style="color:green;">'''✓'''</span> |
||
|- |
|- |
||
| − | | rowspan="3" | {{Icon|affliction_rst_up|40}} || +2% Affliction RST || +3% Affliction RST || rowspan="3" | ? || <span style="color:green;">'''✓'''</span> || <span style="color:red;">'''✗'''</span> || <span style="color: |
+ | | rowspan="3" | {{Icon|affliction_rst_up|40}} || +2% Affliction RST || +3% Affliction RST || rowspan="3" | ? || <span style="color:green;">'''✓'''</span> || <span style="color:red;">'''✗'''</span> || <span style="color:red;">'''✗'''</span> |
|- |
|- |
||
| +3% Affliction RST || +4% Affliction RST || <span style="color:red;">'''✗'''</span> || <span style="color:green;">'''✓'''</span> || <span style="color:red;">'''✗'''</span> |
| +3% Affliction RST || +4% Affliction RST || <span style="color:red;">'''✗'''</span> || <span style="color:green;">'''✓'''</span> || <span style="color:red;">'''✗'''</span> |
||
| Line 158: | Line 161: | ||
| +4% Affliction RST || +5% Affliction RST || <span style="color:red;">'''✗'''</span> || <span style="color:green;">'''✓'''</span> || <span style="color:green;">'''✓'''</span> |
| +4% Affliction RST || +5% Affliction RST || <span style="color:red;">'''✗'''</span> || <span style="color:green;">'''✓'''</span> || <span style="color:green;">'''✓'''</span> |
||
|- class="even" |
|- class="even" |
||
| − | | rowspan="3" | {{Icon|hp_up|40}} || +2% HP || +3% HP || rowspan="3" | 40% || <span style="color:green;">'''✓'''</span> || <span style="color:green;">'''✓'''</span> || <span style="color: |
+ | | rowspan="3" | {{Icon|hp_up|40}} || +2% HP || +3% HP || rowspan="3" | 40% || <span style="color:green;">'''✓'''</span> || <span style="color:green;">'''✓'''</span> || <span class="" style="color:green;">'''✓'''</span> |
|- class="even" |
|- class="even" |
||
| +3% HP || +4% HP || <span style="color:red;">'''✗'''</span> || <span style="color:green;">'''✓'''</span> || <span style="color:green;">'''✓'''</span> |
| +3% HP || +4% HP || <span style="color:red;">'''✗'''</span> || <span style="color:green;">'''✓'''</span> || <span style="color:green;">'''✓'''</span> |
||
| Line 164: | Line 167: | ||
| +4% HP || +5% HP || <span style="color:red;">'''✗'''</span> || <span style="color:red;">'''✗'''</span> || <span style="color:green;">'''✓'''</span> |
| +4% HP || +5% HP || <span style="color:red;">'''✗'''</span> || <span style="color:red;">'''✗'''</span> || <span style="color:green;">'''✓'''</span> |
||
|- |
|- |
||
| − | | rowspan="2" | {{Icon|regen_up|40}} || +1% Heal || +2% Heal || rowspan="2" | 40% || <span style="color:red;">'''✗'''</span> || <span style="color:green;">'''✓'''</span> || <span style="color: |
+ | | rowspan="2" | {{Icon|regen_up|40}} || +1% Heal || +2% Heal || rowspan="2" | 40% || <span style="color:red;">'''✗'''</span> || <span style="color:green;">'''✓'''</span> || <span style="color:green;">'''✓'''</span> |
|- |
|- |
||
| +3% Heal || +5% Heal || <span style="color:red;">'''✗'''</span> || <span style="color:green;">'''✓'''</span> || <span style="color:green;">'''✓'''</span> |
| +3% Heal || +5% Heal || <span style="color:red;">'''✗'''</span> || <span style="color:green;">'''✓'''</span> || <span style="color:green;">'''✓'''</span> |
||
|- class="even" |
|- class="even" |
||
| − | | {{Icon| |
+ | | {{Icon|mode_gauge_down|40}} || +3% Mode Gauge<br />Reduction Rate || +4% Mode Gauge<br />Reduction Rate || 50% || <span style="color:green;">'''✓'''</span> || <span style="color:red;">'''✗'''</span> || <span style="color:red;">'''✗'''</span> |
|- |
|- |
||
| {{Icon|snatch|40}} |
| {{Icon|snatch|40}} |
||
| − | | colspan="2" | +1% Item Drop Rate || 5% || <span style="color:green;">'''✓'''</span> || <span style="color:green;">'''✓'''</span> || <span style="color: |
+ | | colspan="2" | +1% Item Drop Rate || 5% || <span style="color:green;">'''✓'''</span> || <span style="color:green;">'''✓'''</span> || <span style="color:red;">'''✗'''</span> |
|} |
|} |
||
| + | |||
| ⚫ | |||
| + | |||
| ⚫ | |||
Effects that are preceded by a number in brackets, such as {{Icon|def_up}} [2] DEF +8% or {{Icon|atk_up}} [3] Counterattack +15% are slot-based effects. This means the effect is only activated when the accessory is equipped in the position of the number in brackets. For example, an accessory with [2] DEF +8% will only give the +8% DEF when it is equipped in the second accessory slot of a Kamihime. An accessory with [3] Counterattack +15% will only give the +15% Counterattack when it is equipped in the third accessory slot. |
Effects that are preceded by a number in brackets, such as {{Icon|def_up}} [2] DEF +8% or {{Icon|atk_up}} [3] Counterattack +15% are slot-based effects. This means the effect is only activated when the accessory is equipped in the position of the number in brackets. For example, an accessory with [2] DEF +8% will only give the +8% DEF when it is equipped in the second accessory slot of a Kamihime. An accessory with [3] Counterattack +15% will only give the +15% Counterattack when it is equipped in the third accessory slot. |
||
| Line 180: | Line 185: | ||
These effects give greater bonuses than the regular slot-agnostic effects, and are currently only found on Devil Series accessories. |
These effects give greater bonuses than the regular slot-agnostic effects, and are currently only found on Devil Series accessories. |
||
| ⚫ | |||
| ⚫ | |||
| + | ! Icon !! Base !! Max lvl !! Cap !! Slot Required |
||
| − | Accessories can only be enhanced through the Enhance system and unlike characters and weapons it costs gems to enhance them. The formula to calculate the total cost is: |
||
| − | |||
| − | <math> Total ~ Cost = Level ~ of ~ base ~ Accessory \times Number ~ of ~ Materials \times 100</math> |
||
| − | |||
| − | Enhancing accessories increases their HP and ATK stats. Using another Accessory of the same element or an enhance material will increase its EXP provision by 50%. |
||
| − | |||
| − | {{clr}} |
||
| − | |||
| ⚫ | |||
| − | ! Rarity !! Different Element !! Same Element |
||
|- |
|- |
||
| − | | {{Icon| |
+ | | {{Icon|atk_up|40}} || +8% ATK || +10% ATK || 40% || [1] |
| + | |- class="even" |
||
| + | | {{Icon|def_up|40}} || +8% DEF || +10% DEF || 40% || [2] |
||
|- |
|- |
||
| − | | {{Icon| |
+ | | {{Icon|hp_up|40}} || +8% HP || +10% HP || 40% || [2] |
| + | |- class="even" |
||
| + | | {{Icon|atk_up|40}} || +10% Counterattack || +15% Counterattack || 15% || [3] |
||
|- |
|- |
||
| − | | {{Icon| |
+ | | {{Icon|crit_up|40}} || +8% Crit Rate || +10% Crit Rate || +10% || [1] |
| + | |- class="even" |
||
| + | | {{Icon|target_reduce|40}} || +2% Evasion Rate || +3% Evasion Rate || 3% || [3] |
||
|- |
|- |
||
| − | | {{Icon| |
+ | | {{Icon|def_up|40}} || +3% DMG Cut || +5% DMG Cut || 5% || [2] |
| + | |- class="even" |
||
| + | | {{Icon|double_up|40}} || +3% Double Attack Rate || +5% Double Attack Rate || 15% || [1] |
||
|- |
|- |
||
| − | | {{Icon| |
+ | | {{Icon|regen_up|40}} || +6% Heal || +8% Heal || 40% || [3] |
| ⚫ | |||
| ⚫ | |||
|} |
|} |
||
| ⚫ | |||
| − | Combinations to enhance an SSR accessory from level 1 to 50 and combinations to make a different-element accessory equivalent in EXP to a same-element accessory of the same rarity to replace one in a "level 1 to 50 combination" (ie: R: 100 EXP -> 157 EXP; SR: 200 EXP -> 309 EXP; SSR: 400 EXP -> 607 EXP): |
||
| + | Accessories can only be enhanced through the Enhance system. Enhancing accessories increases their HP and ATK stats. |
||
| − | <gallery widths="300px" hideaddbutton="true" position="center" spacing="small" captionalign="center"> |
||
| − | Combinations to enhance an SSR accessory from level 1 to 50 in 2 steps.PNG|Materials |
||
| − | Cost to enhance an SSR accessory from level 1 to 50 in 2 steps.PNG|Gem Cost |
||
| − | Combinations and costs to make an off-element accessory equivalent to a same-element accessory of the same rarity.PNG|Different-Element / Same-Element equivalency |
||
| − | </gallery>'''Enhancement method''' |
||
| + | {| class="BandedRows" style="width:40%;" align="center" |
||
| − | # Select how many SSRs you want to use in enhancing your accessory. |
||
| + | ! Rarity !! Enhancement |
||
| − | # Go down the column with that number in the "materials" table and select the number of Rs and SRs you want to use. |
||
| + | Experience Value |
||
| − | # Start enhancing the accessory with the 20 fodders worth the least amount of EXP. |
||
| + | |- |
||
| − | # Finish enhancing it with the remainder. |
||
| + | | {{Icon|n|x40}} || 75 |
||
| + | |- class="even" |
||
| + | | {{Icon|r|x40}} || 150 |
||
| + | |- |
||
| + | | {{Icon|sr|x40}} || 300 |
||
| + | |- class="even" |
||
| + | | {{Icon|ssr|x40}} || 750 |
||
| + | |- |
||
| + | | {{Icon|r|x40}}<br />(Enhance Material) || 200 |
||
| + | |- class="even" |
||
| ⚫ | |||
| + | |} |
||
| + | Since May 2020, most of the Enhance Materials obtainable through events and the shop were replaced by [[EXP Spheres]]. |
||
| − | Ex.: If you select the 9-22-9 combination (Column 9, line 1 in the "Materials" table) you will start enhancing with 9 Rs and 11 SRs (Maximum total: 20). Once this is done, enhance it again with the remaining 11 SRs and 9 SSRs. |
||
== See Also == |
== See Also == |
||
| Line 224: | Line 234: | ||
== List == |
== List == |
||
<!-- |
<!-- |
||
| − | To add or change |
+ | To add or change Accessories visit: http://kamihime-project.wikia.com/wiki/Module:Accessory_Database |
To change the table layout visit: http://kamihime-project.wikia.com/wiki/Module:Accessory_DisplayTable |
To change the table layout visit: http://kamihime-project.wikia.com/wiki/Module:Accessory_DisplayTable |
||
--> |
--> |
||
| Line 235: | Line 245: | ||
|-| SSR = {{#invoke:Accessory DisplayTable|main|header=yes|SSR}} |
|-| SSR = {{#invoke:Accessory DisplayTable|main|header=yes|SSR}} |
||
|-| Ancient = {{#invoke:Accessory DisplayTable|main|header=yes|Ancient}} |
|-| Ancient = {{#invoke:Accessory DisplayTable|main|header=yes|Ancient}} |
||
| + | |-| Devil = {{#invoke:Accessory DisplayTable|main|header=yes|Devil}} |
||
|-| All = {{#invoke:Accessory DisplayTable|main|header=yes|All}} |
|-| All = {{#invoke:Accessory DisplayTable|main|header=yes|All}} |
||
</tabber> |
</tabber> |
||
Revision as of 03:44, 27 August 2020

Accessories are items which can be equipped to a Kamihime to boost her Attack and HP, and give other advantageous effects such as increased double attack rate or increased defense. In order to use accessories the player must be rank 20 or higher.
Acquiring Accessories
The main method to obtain accessories is to complete Accessory Quests. These quests can only be attempted three times per day and have seven levels of difficulty
- Rank 1: Corresponds to Expert difficulty Advent Battles
- Rank 2: Corresponds to Ultimate difficulty Advent Battles
- Rank 3: Corresponds to Ragnarok difficulty Advent Battles. Requires three T2 Dragon Bones of the corresponding element in order to attempt the quest. Guarantees an SR Accessory with a small chance of an SSR Accessory. No item cost on Sundays.
- Rank 4: Exceeds Ragnarok difficulty Advent Battles. Requires three Runes of the corresponding element. Guarantees one SR and one SSR accessories. No item cost on Sundays.
- Rank 5: Very high difficulty. Requires three Dragon Bones of the corresponding element. Drops two or three SR accessories and one SSR or Ancient accessory. No item cost on Sundays.
- Rank 6: Slightly more difficult than rank 5. Requires three Dragon Bones of the corresponding element. Drops a number of SR accessories and 1-2 SSR or Ancient accessories. No item cost on Sundays.
- Rank 7: Slightly more difficult than rank 6. Requires three Dragon Bones of the corresponding element. Drops a number of SR accessories and 2 SSR accessories which can include Ancient or Devil Series. No item cost on Sundays.
Each day features a different element, using the following weekly rotation:
- Monday: Thunder
- Tuesday: Fire
- Wednesday: Water
- Thursday: Wind
- Friday: Light
- Saturday: Dark
- Sunday: Each stage of the quest will have a random element.
There are also a few places in the Shop to exchange various currencies for accessories. This includes Accessory Points, obtained by selling accessories.
| Rarity | Sell Value |
|---|---|
| 50 | |
| 50 | |
| 100 | |
| 250 |
Equipping Accessories
Kamihime can only equip accessories that match their element and, initially, are limited to three accessories. It's possible to unlock a 4th and 5th slots by spending the appropriate materials.
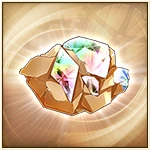
| Rarity | Materials | |||
|---|---|---|---|---|
 5x Dragon Bones |
 5x Lithographs |
 5x Sacred Stone Shards |
 5x Relic Magna Cravis | |
 5x Dragon Bones |
 5x Lithographs |
 10x Holy Jewel of Light |
10x Relic Magna Cravis | |
 5x Fang |
 5x Idea Cores |
 10x Holy Crystal of Light |
20x Relic Magna Cravis | |
| Rarity | Materials | |||
|---|---|---|---|---|
10x Dragon Bones |
10x Lithographs |
10x Sacred Stone Shards |
10x Relic Magna Cravis | |
10x Dragon Bones |
10x Lithographs |
20x Holy Jewel of Light |
20x Relic Magna Cravis | |
10x Fang |
10x Idea Cores |
20x Holy Crystal of Light |
40x Relic Magna Cravis | |
Series
Accessories have two series, Type and Unique. The Type series can be Bracelet, Brooch, Earrings, Necklace, Ring or Tiara. Unique series can be Normal, Ancient, or Devil (Accessories below SSR rarity always have Normal series). If a Kamihime has all five of her accessory slots unlocked and have three accessories of the same Type or Unique, she will receive a bonus effect. If both Type and Unique series requirements are met, the Type series effects will take precedence.
| Series | Effect | |
|---|---|---|
| Type | Bracelet | 5% Follow-up |
| Brooch | ||
| Earring | Start battle with Burst Gauge↑ (30) | |
| Necklace | ||
| Ring | ||
| Tiara | ||
| Unique | Normal | Start battle with 350 HP |
| Ancient | Start battle with | |
| Devil | Start battle with |
Effects
An accessory can have up three random effects, depending on their rarity and type. Each effect has a base value and will increase once the accessory reaches max level.
| Icon | Base | Max lvl | Cap | Normal | Ancient | Devil |
|---|---|---|---|---|---|---|
| +2% ATK | +3% ATK | 40% | ✓ | ✓ | ✓ | |
| +3% ATK | +4% ATK | ✗ | ✓ | ✓ | ||
| +4% ATK | +5% ATK | ✗ | ✗ | ✓ | ||
| +3% Ability Damage | +5% Ability Damage | ? | ✓ | ✗ | ✗ | |
| +5% Ability Damage | +8% Ability Damage | ✗ | ✓ | ✓ | ||
| +3% Burst Damage | +5% Burst Damage | ? | ✓ | ✗ | ✗ | |
| +5% Burst Damage | +8% Burst Damage | ✗ | ✓ | ✓ | ||
| +1% Double Attack Rate | +2% Double Attack Rate | 15% | ✓ | ✓ | ✓ | |
| +1% Triple Attack Rate | +2% Triple Attack Rate | 10% | ✗ | ✓ | ✓ | |
| +1% Burst Gauge | +2% Burst Gauge | ? | ✗ | ✓ | ✓ | |
| +1% Affliction Rate | +2% Affliction Rate | 15% | ✓ | ✓ | ✓ | |
| +2% DEF | +3% DEF | 40% | ✓ | ✓ | ✓ | |
| +3% DEF | +4% DEF | ✗ | ✓ | ✓ | ||
| +4% DEF | +5% DEF | ✗ | ✗ | ✓ | ||
| +2% Affliction RST | +3% Affliction RST | ? | ✓ | ✗ | ✗ | |
| +3% Affliction RST | +4% Affliction RST | ✗ | ✓ | ✗ | ||
| +4% Affliction RST | +5% Affliction RST | ✗ | ✓ | ✓ | ||
| +2% HP | +3% HP | 40% | ✓ | ✓ | ✓ | |
| +3% HP | +4% HP | ✗ | ✓ | ✓ | ||
| +4% HP | +5% HP | ✗ | ✗ | ✓ | ||
| +1% Heal | +2% Heal | 40% | ✗ | ✓ | ✓ | |
| +3% Heal | +5% Heal | ✗ | ✓ | ✓ | ||
| +3% Mode Gauge Reduction Rate |
+4% Mode Gauge Reduction Rate |
50% | ✓ | ✗ | ✗ | |
| +1% Item Drop Rate | 5% | ✓ | ✓ | ✗ | ||
Slot-Based Effects
Effects that are preceded by a number in brackets, such as ![]() [2] DEF +8% or
[2] DEF +8% or ![]() [3] Counterattack +15% are slot-based effects. This means the effect is only activated when the accessory is equipped in the position of the number in brackets. For example, an accessory with [2] DEF +8% will only give the +8% DEF when it is equipped in the second accessory slot of a Kamihime. An accessory with [3] Counterattack +15% will only give the +15% Counterattack when it is equipped in the third accessory slot.
[3] Counterattack +15% are slot-based effects. This means the effect is only activated when the accessory is equipped in the position of the number in brackets. For example, an accessory with [2] DEF +8% will only give the +8% DEF when it is equipped in the second accessory slot of a Kamihime. An accessory with [3] Counterattack +15% will only give the +15% Counterattack when it is equipped in the third accessory slot.
These effects give greater bonuses than the regular slot-agnostic effects, and are currently only found on Devil Series accessories.
| Icon | Base | Max lvl | Cap | Slot Required |
|---|---|---|---|---|
| +8% ATK | +10% ATK | 40% | [1] | |
| +8% DEF | +10% DEF | 40% | [2] | |
| +8% HP | +10% HP | 40% | [2] | |
| +10% Counterattack | +15% Counterattack | 15% | [3] | |
| +8% Crit Rate | +10% Crit Rate | +10% | [1] | |
| +2% Evasion Rate | +3% Evasion Rate | 3% | [3] | |
| +3% DMG Cut | +5% DMG Cut | 5% | [2] | |
| +3% Double Attack Rate | +5% Double Attack Rate | 15% | [1] | |
| +6% Heal | +8% Heal | 40% | [3] |
Enhance
Accessories can only be enhanced through the Enhance system. Enhancing accessories increases their HP and ATK stats.
| Rarity | Enhancement
Experience Value |
|---|---|
| 75 | |
| 150 | |
| 300 | |
| 750 | |
(Enhance Material) |
200 |
(Enhance Material) |
400 |
Since May 2020, most of the Enhance Materials obtainable through events and the shop were replaced by EXP Spheres.
See Also
List
Tip: Hold shift to sort multiple columns.
| Attack | HP | Total Power | |||||||||
|---|---|---|---|---|---|---|---|---|---|---|---|
| Name | Image | Rar. | Elem. | Effects | Max Lvl | Min | Max | Min | Max | Min | Max |
| Dark Bracelet | 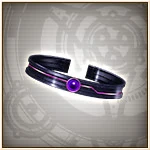
|
0 | 20 | 72 | 360 | 8 | 38 | 80 | 398 | ||
| Dark Brooch | 
|
0 | 20 | 78 | 390 | 12 | 42 | 90 | 432 | ||
| Dark Earring | 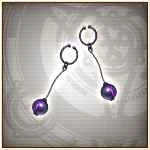
|
0 | 20 | 80 | 400 | 8 | 50 | 88 | 450 | ||
| Dark Necklace | 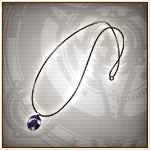
|
0 | 20 | 64 | 320 | 4 | 34 | 68 | 354 | ||
| Dark Ring | 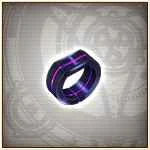
|
0 | 20 | 60 | 300 | 4 | 30 | 64 | 330 | ||
| Dark Tiara | 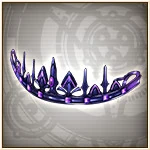
|
0 | 20 | 72 | 360 | 12 | 50 | 84 | 410 | ||
| Fire Bracelet | 
|
0 | 20 | 72 | 360 | 8 | 38 | 80 | 398 | ||
| Fire Brooch | 
|
0 | 20 | 78 | 390 | 12 | 42 | 90 | 432 | ||
| Fire Earring | 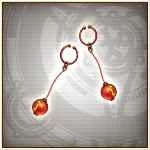
|
0 | 20 | 80 | 400 | 8 | 50 | 88 | 450 | ||
| Fire Necklace | 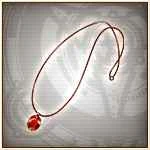
|
0 | 20 | 64 | 320 | 4 | 34 | 68 | 354 | ||
| Fire Ring | 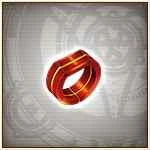
|
0 | 20 | 60 | 300 | 4 | 30 | 64 | 330 | ||
| Fire Tiara | 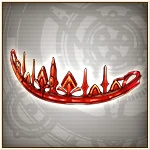
|
0 | 20 | 72 | 360 | 12 | 50 | 84 | 410 | ||
| Light Bracelet | 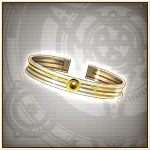
|
0 | 20 | 72 | 360 | 8 | 38 | 80 | 398 | ||
| Light Brooch | 
|
0 | 20 | 78 | 390 | 12 | 42 | 90 | 432 | ||
| Light Earring | 
|
0 | 20 | 80 | 400 | 8 | 50 | 88 | 450 | ||
| Light Necklace | 
|
0 | 20 | 64 | 320 | 4 | 34 | 68 | 354 | ||
| Light Ring | 
|
0 | 20 | 60 | 300 | 4 | 30 | 64 | 330 | ||
| Light Tiara | 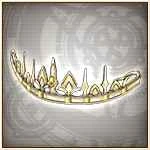
|
0 | 20 | 72 | 360 | 12 | 50 | 84 | 410 | ||
| Thunder Bracelet | 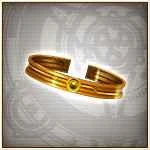
|
0 | 20 | 72 | 360 | 8 | 38 | 80 | 398 | ||
| Thunder Brooch | 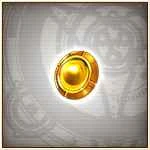
|
0 | 20 | 78 | 390 | 12 | 42 | 90 | 432 | ||
| Thunder Earring | 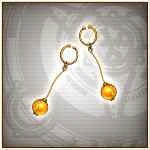
|
0 | 20 | 80 | 400 | 8 | 50 | 88 | 450 | ||
| Thunder Necklace | 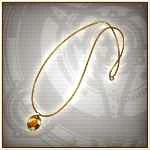
|
0 | 20 | 64 | 320 | 4 | 34 | 68 | 354 | ||
| Thunder Ring | 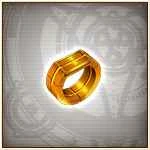
|
0 | 20 | 60 | 300 | 4 | 30 | 64 | 330 | ||
| Thunder Tiara | 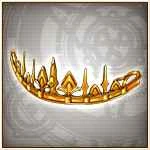
|
0 | 20 | 72 | 360 | 12 | 50 | 84 | 410 | ||
| Water Bracelet | 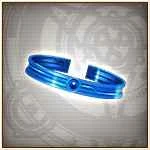
|
0 | 20 | 72 | 360 | 8 | 38 | 80 | 398 | ||
| Water Brooch | 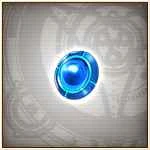
|
0 | 20 | 78 | 390 | 12 | 42 | 90 | 432 | ||
| Water Earring | 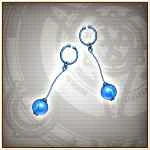
|
0 | 20 | 80 | 400 | 8 | 50 | 88 | 450 | ||
| Water Necklace | 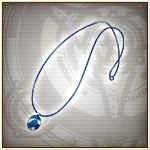
|
0 | 20 | 64 | 320 | 4 | 34 | 68 | 354 | ||
| Water Ring | 
|
0 | 20 | 60 | 300 | 4 | 30 | 64 | 330 | ||
| Water Tiara | 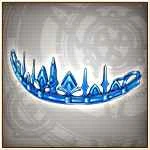
|
0 | 20 | 72 | 360 | 12 | 50 | 84 | 410 | ||
| Wind Bracelet | 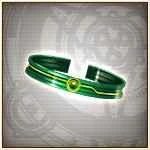
|
0 | 20 | 72 | 360 | 8 | 38 | 80 | 398 | ||
| Wind Brooch | 
|
0 | 20 | 78 | 390 | 12 | 42 | 90 | 432 | ||
| Wind Earring | 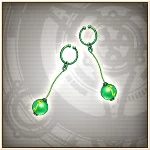
|
0 | 20 | 80 | 400 | 8 | 50 | 88 | 450 | ||
| Wind Necklace | 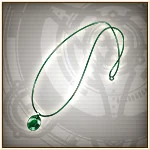
|
0 | 20 | 64 | 320 | 4 | 34 | 68 | 354 | ||
| Wind Ring | 
|
0 | 20 | 60 | 300 | 4 | 30 | 64 | 330 | ||
| Wind Tiara | 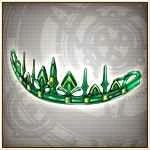
|
0 | 20 | 72 | 360 | 12 | 50 | 84 | 410 | ||
| Attack | HP | Total Power | |||||||||
|---|---|---|---|---|---|---|---|---|---|---|---|
| Name | Image | Rar. | Elem. | Effects | Max Lvl | Min | Max | Min | Max | Min | Max |
| Blustery Bracelet | 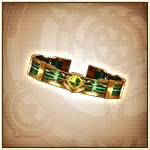
|
1 | 30 | 110 | 550 | 16 | 74 | 126 | 624 | ||
| Blustery Brooch | 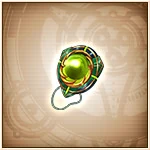
|
1 | 30 | 118 | 590 | 20 | 84 | 138 | 674 | ||
| Blustery Earring | 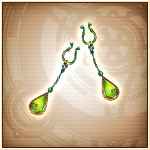
|
1 | 30 | 120 | 600 | 16 | 90 | 136 | 690 | ||
| Blustery Necklace | 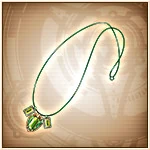
|
1 | 30 | 104 | 520 | 12 | 60 | 116 | 580 | ||
| Blustery Ring | 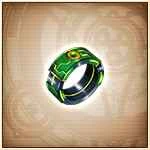
|
0 | 30 | 100 | 500 | 12 | 50 | 112 | 550 | ||
| Blustery Tiara | 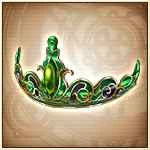
|
1 | 30 | 114 | 570 | 10 | 100 | 124 | 670 | ||
| Brilliant Bracelet | 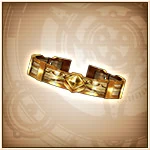
|
1 | 30 | 110 | 550 | 16 | 74 | 126 | 624 | ||
| Brilliant Brooch | 
|
1 | 30 | 118 | 590 | 20 | 84 | 138 | 674 | ||
| Brilliant Earring | 
|
1 | 30 | 120 | 600 | 16 | 90 | 136 | 690 | ||
| Brilliant Necklace | 
|
1 | 30 | 104 | 520 | 12 | 60 | 116 | 580 | ||
| Brilliant Ring | 
|
0 | 30 | 100 | 500 | 12 | 50 | 112 | 550 | ||
| Brilliant Tiara | 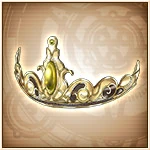
|
1 | 30 | 114 | 570 | 10 | 100 | 124 | 670 | ||
| Flowing Water Bracelet | 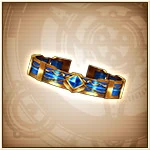
|
1 | 30 | 110 | 550 | 16 | 74 | 126 | 624 | ||
| Flowing Water Brooch | 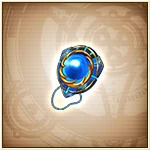
|
1 | 30 | 118 | 590 | 20 | 84 | 138 | 674 | ||
| Flowing Water Earring | 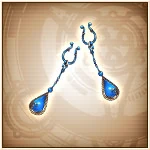
|
1 | 30 | 120 | 600 | 16 | 90 | 136 | 690 | ||
| Flowing Water Necklace | 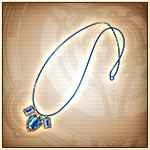
|
1 | 30 | 104 | 520 | 12 | 60 | 116 | 580 | ||
| Flowing Water Ring | 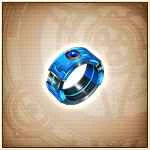
|
0 | 30 | 100 | 500 | 12 | 50 | 112 | 550 | ||
| Flowing Water Tiara | 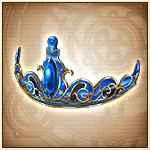
|
1 | 30 | 114 | 570 | 10 | 100 | 124 | 670 | ||
| Raging Fire Bracelet | 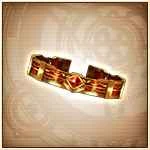
|
1 | 30 | 110 | 550 | 16 | 74 | 126 | 624 | ||
| Raging Fire Brooch | 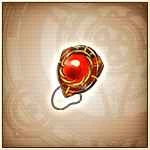
|
1 | 30 | 118 | 590 | 20 | 84 | 138 | 674 | ||
| Raging Fire Earring | 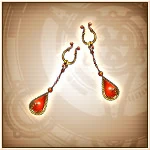
|
1 | 30 | 120 | 600 | 16 | 90 | 136 | 690 | ||
| Raging Fire Necklace | 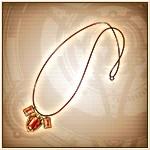
|
1 | 30 | 104 | 520 | 12 | 60 | 116 | 580 | ||
| Raging Fire Ring | 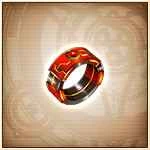
|
0 | 30 | 100 | 500 | 12 | 50 | 112 | 550 | ||
| Raging Fire Tiara | 
|
1 | 30 | 114 | 570 | 10 | 100 | 124 | 670 | ||
| Shadow Bracelet | 
|
1 | 30 | 110 | 550 | 16 | 74 | 126 | 624 | ||
| Shadow Brooch | 
|
1 | 30 | 118 | 590 | 20 | 84 | 138 | 674 | ||
| Shadow Earring | 
|
1 | 30 | 120 | 600 | 16 | 90 | 136 | 690 | ||
| Shadow Necklace | 
|
1 | 30 | 104 | 520 | 12 | 60 | 116 | 580 | ||
| Shadow Ring | 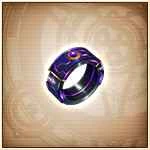
|
0 | 30 | 100 | 500 | 12 | 50 | 112 | 550 | ||
| Shadow Tiara | 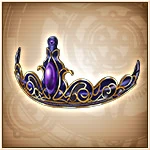
|
1 | 30 | 114 | 570 | 10 | 100 | 124 | 670 | ||
| Storm Bracelet | 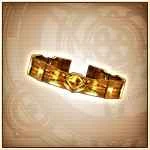
|
1 | 30 | 110 | 550 | 16 | 74 | 126 | 624 | ||
| Storm Brooch | 
|
1 | 30 | 118 | 590 | 20 | 84 | 138 | 674 | ||
| Storm Earring | 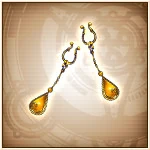
|
1 | 30 | 120 | 600 | 16 | 90 | 136 | 690 | ||
| Storm Necklace | 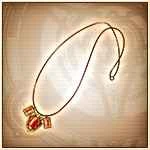
|
1 | 30 | 104 | 520 | 12 | 60 | 116 | 580 | ||
| Storm Ring | 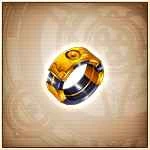
|
0 | 30 | 100 | 500 | 12 | 50 | 112 | 550 | ||
| Storm Tiara | 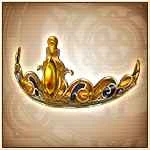
|
1 | 30 | 114 | 570 | 10 | 100 | 124 | 670 | ||
| Attack | HP | Total Power | |||||||||
|---|---|---|---|---|---|---|---|---|---|---|---|
| Name | Image | Rar. | Elem. | Effects | Max Lvl | Min | Max | Min | Max | Min | Max |
| Abyssal Bracelet | 
|
2 | 40 | 152 | 760 | 24 | 126 | 176 | 886 | ||
| Abyssal Brooch | 
|
2 | 40 | 158 | 790 | 28 | 134 | 186 | 924 | ||
| Abyssal Earring | 
|
2 | 40 | 160 | 800 | 24 | 140 | 184 | 940 | ||
| Abyssal Necklace | 
|
2 | 40 | 144 | 720 | 20 | 116 | 164 | 836 | ||
| Abyssal Ring | 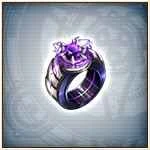
|
1 | 40 | 142 | 710 | 20 | 106 | 162 | 816 | ||
| Abyssal Tiara | 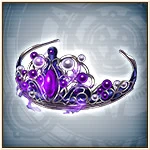
|
2 | 40 | 156 | 780 | 28 | 150 | 184 | 930 | ||
| Blazing Bracelet | 
|
2 | 40 | 152 | 760 | 24 | 126 | 176 | 886 | ||
| Blazing Brooch | 
|
2 | 40 | 158 | 790 | 28 | 134 | 186 | 924 | ||
| Blazing Earring | 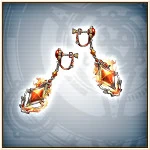
|
2 | 40 | 160 | 800 | 24 | 140 | 184 | 940 | ||
| Blazing Necklace | 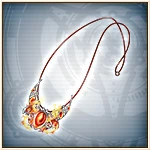
|
2 | 40 | 144 | 720 | 20 | 116 | 164 | 836 | ||
| Blazing Ring | 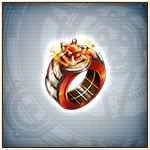
|
1 | 40 | 142 | 710 | 20 | 106 | 162 | 816 | ||
| Blazing Tiara | 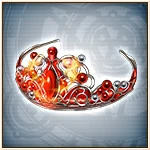
|
2 | 40 | 156 | 780 | 28 | 150 | 184 | 930 | ||
| Electrified Bracelet | 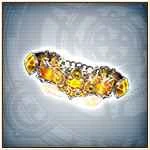
|
2 | 40 | 152 | 760 | 24 | 126 | 176 | 886 | ||
| Electrified Brooch | 
|
2 | 40 | 158 | 790 | 28 | 134 | 186 | 924 | ||
| Electrified Earring | 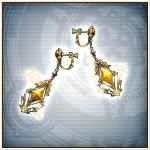
|
2 | 40 | 160 | 800 | 24 | 140 | 184 | 940 | ||
| Electrified Necklace | 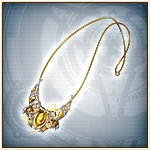
|
2 | 40 | 144 | 720 | 20 | 116 | 164 | 836 | ||
| Electrified Ring | 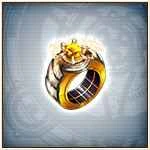
|
1 | 40 | 142 | 710 | 20 | 106 | 162 | 816 | ||
| Electrified Tiara | 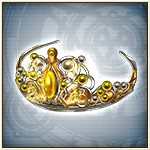
|
2 | 40 | 156 | 780 | 28 | 150 | 184 | 930 | ||
| Gale Bracelet | 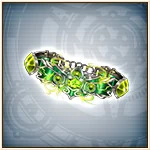
|
2 | 40 | 152 | 760 | 24 | 126 | 176 | 886 | ||
| Gale Brooch | 
|
2 | 40 | 158 | 790 | 28 | 134 | 186 | 924 | ||
| Gale Earring | 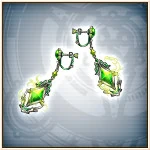
|
2 | 40 | 160 | 800 | 24 | 140 | 184 | 940 | ||
| Gale Necklace | 
|
2 | 40 | 144 | 720 | 20 | 116 | 164 | 836 | ||
| Gale Ring | 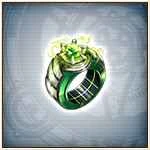
|
1 | 40 | 142 | 710 | 20 | 106 | 162 | 816 | ||
| Gale Tiara | 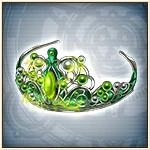
|
2 | 40 | 156 | 780 | 28 | 150 | 184 | 930 | ||
| Holy Light Bracelet | 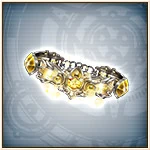
|
2 | 40 | 152 | 760 | 24 | 126 | 176 | 886 | ||
| Holy Light Brooch | 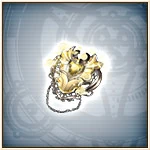
|
2 | 40 | 158 | 790 | 28 | 134 | 186 | 924 | ||
| Holy Light Earring | 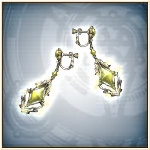
|
2 | 40 | 160 | 800 | 24 | 140 | 184 | 940 | ||
| Holy Light Necklace | 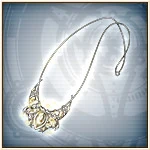
|
2 | 40 | 144 | 720 | 20 | 116 | 164 | 836 | ||
| Holy Light Ring | 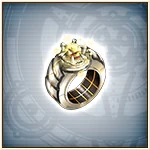
|
1 | 40 | 142 | 710 | 20 | 106 | 162 | 816 | ||
| Holy Light Tiara | 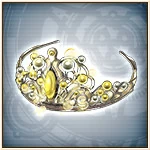
|
2 | 40 | 156 | 780 | 28 | 150 | 184 | 930 | ||
| Rushing Water Bracelet | 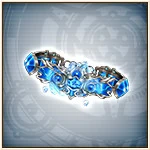
|
2 | 40 | 152 | 760 | 24 | 126 | 176 | 886 | ||
| Rushing Water Brooch | 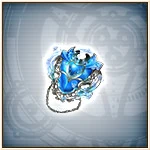
|
2 | 40 | 158 | 790 | 28 | 134 | 186 | 924 | ||
| Rushing Water Earring | 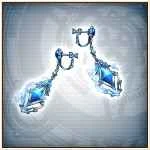
|
2 | 40 | 160 | 800 | 24 | 140 | 184 | 940 | ||
| Rushing Water Necklace | 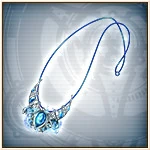
|
2 | 40 | 144 | 720 | 20 | 116 | 164 | 836 | ||
| Rushing Water Ring | 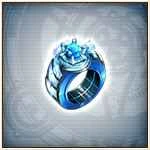
|
1 | 40 | 142 | 710 | 20 | 106 | 162 | 816 | ||
| Rushing Water Tiara | 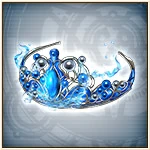
|
2 | 40 | 156 | 780 | 28 | 150 | 184 | 930 | ||
| Attack | HP | Total Power | |||||||||
|---|---|---|---|---|---|---|---|---|---|---|---|
| Name | Image | Rar. | Elem. | Effects | Max Lvl | Min | Max | Min | Max | Min | Max |
| Deluge Bracelet | 
|
3 | 50 | 232 | 1160 | 32 | 170 | 264 | 1330 | ||
| Deluge Brooch | 
|
3 | 50 | 250 | 1250 | 36 | 180 | 286 | 1430 | ||
| Deluge Earring | 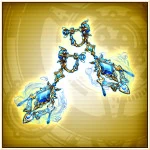
|
2 | 50 | 260 | 1300 | 40 | 184 | 300 | 1484 | ||
| Deluge Necklace | 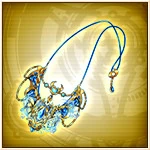
|
3 | 50 | 238 | 1190 | 28 | 156 | 266 | 1346 | ||
| Deluge Ring | 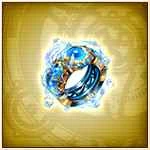
|
2 | 50 | 216 | 1080 | 28 | 144 | 244 | 1224 | ||
| Deluge Tiara | 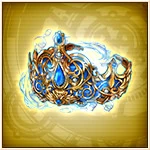
|
3 | 50 | 254 | 1270 | 40 | 190 | 294 | 1460 | ||
| Demonic Bracelet | 
|
3 | 50 | 232 | 1160 | 32 | 170 | 264 | 1330 | ||
| Demonic Brooch | 
|
3 | 50 | 250 | 1250 | 36 | 180 | 286 | 1430 | ||
| Demonic Earring | 
|
2 | 50 | 260 | 1300 | 40 | 184 | 300 | 1484 | ||
| Demonic Necklace | 
|
3 | 50 | 238 | 1190 | 28 | 156 | 266 | 1346 | ||
| Demonic Ring | 
|
2 | 50 | 216 | 1080 | 28 | 144 | 244 | 1224 | ||
| Demonic Tiara | 
|
3 | 50 | 254 | 1270 | 40 | 190 | 294 | 1460 | ||
| Divine Bracelet | 
|
3 | 50 | 232 | 1160 | 32 | 170 | 264 | 1330 | ||
| Divine Brooch | 
|
3 | 50 | 250 | 1250 | 36 | 180 | 286 | 1430 | ||
| Divine Earring | 
|
2 | 50 | 260 | 1300 | 40 | 184 | 300 | 1484 | ||
| Divine Necklace | 
|
3 | 50 | 238 | 1190 | 28 | 156 | 266 | 1346 | ||
| Divine Ring | 
|
2 | 50 | 216 | 1080 | 28 | 144 | 244 | 1224 | ||
| Divine Tiara | 
|
3 | 50 | 254 | 1270 | 40 | 190 | 294 | 1460 | ||
| Hurricane Bracelet | 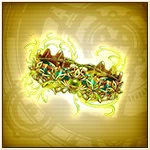
|
3 | 50 | 232 | 1160 | 32 | 170 | 264 | 1330 | ||
| Hurricane Brooch | 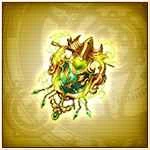
|
3 | 50 | 250 | 1250 | 36 | 180 | 286 | 1430 | ||
| Hurricane Earring | 
|
2 | 50 | 260 | 1300 | 40 | 184 | 300 | 1484 | ||
| Hurricane Necklace | 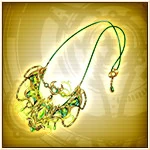
|
3 | 50 | 238 | 1190 | 28 | 156 | 266 | 1346 | ||
| Hurricane Ring | 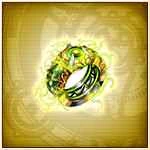
|
2 | 50 | 216 | 1080 | 28 | 144 | 244 | 1224 | ||
| Hurricane Tiara | 
|
3 | 50 | 254 | 1270 | 40 | 190 | 294 | 1460 | ||
| Inferno Bracelet | 
|
3 | 50 | 232 | 1160 | 32 | 170 | 264 | 1330 | ||
| Inferno Brooch | 
|
3 | 50 | 250 | 1250 | 36 | 180 | 286 | 1430 | ||
| Inferno Earring | 
|
2 | 50 | 260 | 1300 | 40 | 184 | 300 | 1484 | ||
| Inferno Necklace | 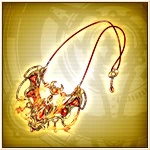
|
3 | 50 | 238 | 1190 | 28 | 156 | 266 | 1346 | ||
| Inferno Ring | 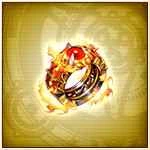
|
2 | 50 | 216 | 1080 | 28 | 144 | 244 | 1224 | ||
| Inferno Tiara | 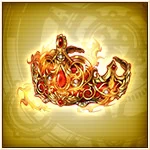
|
3 | 50 | 254 | 1270 | 40 | 190 | 294 | 1460 | ||
| Plasmic Bracelet | 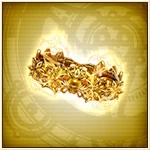
|
3 | 50 | 232 | 1160 | 32 | 170 | 264 | 1330 | ||
| Plasmic Brooch | 
|
3 | 50 | 250 | 1250 | 36 | 180 | 286 | 1430 | ||
| Plasmic Earring | 
|
2 | 50 | 260 | 1300 | 40 | 184 | 300 | 1484 | ||
| Plasmic Necklace | 
|
3 | 50 | 238 | 1190 | 28 | 156 | 266 | 1346 | ||
| Plasmic Ring | 
|
2 | 50 | 216 | 1080 | 28 | 144 | 244 | 1224 | ||
| Plasmic Tiara | 
|
3 | 50 | 254 | 1270 | 40 | 190 | 294 | 1460 | ||
| Attack | HP | Total Power | |||||||||
|---|---|---|---|---|---|---|---|---|---|---|---|
| Name | Image | Rar. | Elem. | Effects | Max Lvl | Min | Max | Min | Max | Min | Max |
| Ancient Deluge Bracelet | 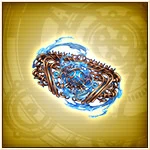
|
3 | 50 | 255 | 1276 | 40 | 187 | 295 | 1463 | ||
| Ancient Deluge Brooch | 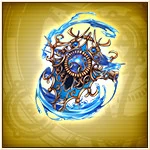
|
3 | 50 | 275 | 1375 | 40 | 198 | 315 | 1573 | ||
| Ancient Deluge Earring | 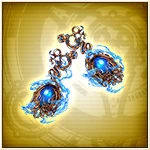
|
2 | 50 | 286 | 1430 | 40 | 202 | 326 | 1632 | ||
| Ancient Deluge Necklace | 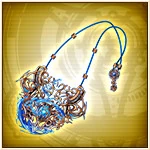
|
3 | 50 | 262 | 1309 | 40 | 172 | 302 | 1481 | ||
| Ancient Deluge Ring | 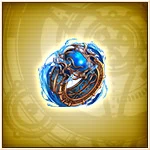
|
2 | 50 | 238 | 1188 | 40 | 158 | 278 | 1346 | ||
| Ancient Deluge Tiara | 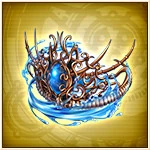
|
3 | 50 | 279 | 1397 | 40 | 209 | 319 | 1606 | ||
| Ancient Demonic Bracelet | 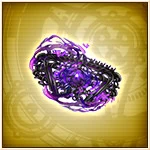
|
3 | 50 | 255 | 1276 | 40 | 187 | 295 | 1463 | ||
| Ancient Demonic Brooch | 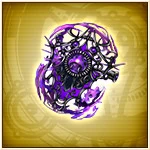
|
3 | 50 | 275 | 1375 | 40 | 198 | 315 | 1573 | ||
| Ancient Demonic Earring | 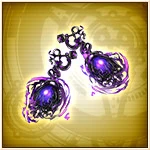
|
2 | 50 | 286 | 1430 | 40 | 202 | 326 | 1632 | ||
| Ancient Demonic Necklace | 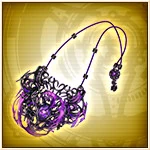
|
3 | 50 | 262 | 1309 | 40 | 172 | 302 | 1481 | ||
| Ancient Demonic Ring | 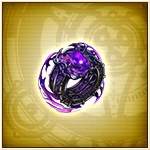
|
2 | 50 | 238 | 1188 | 40 | 158 | 278 | 1346 | ||
| Ancient Demonic Tiara | 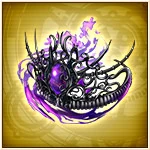
|
3 | 50 | 279 | 1397 | 40 | 209 | 319 | 1606 | ||
| Ancient Divine Bracelet | 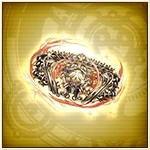
|
3 | 50 | 255 | 1276 | 40 | 187 | 295 | 1463 | ||
| Ancient Divine Brooch | 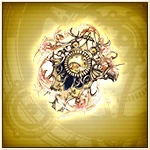
|
3 | 50 | 275 | 1375 | 40 | 198 | 315 | 1573 | ||
| Ancient Divine Earring | 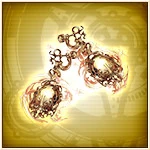
|
2 | 50 | 286 | 1430 | 40 | 202 | 326 | 1632 | ||
| Ancient Divine Necklace | 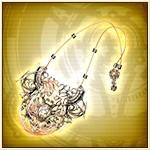
|
3 | 50 | 262 | 1309 | 40 | 172 | 302 | 1481 | ||
| Ancient Divine Ring | 
|
2 | 50 | 238 | 1188 | 40 | 158 | 278 | 1346 | ||
| Ancient Divine Tiara | 
|
3 | 50 | 279 | 1397 | 40 | 209 | 319 | 1606 | ||
| Ancient Inferno Bracelet | 
|
3 | 50 | 255 | 1276 | 40 | 187 | 295 | 1463 | ||
| Ancient Inferno Brooch | 
|
3 | 50 | 275 | 1375 | 40 | 198 | 315 | 1573 | ||
| Ancient Inferno Earring | 
|
2 | 50 | 286 | 1430 | 40 | 202 | 326 | 1632 | ||
| Ancient Inferno Necklace | 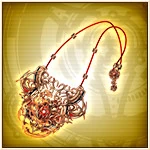
|
3 | 50 | 262 | 1309 | 40 | 172 | 302 | 1481 | ||
| Ancient Inferno Ring | 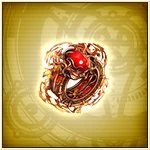
|
2 | 50 | 238 | 1188 | 40 | 158 | 278 | 1346 | ||
| Ancient Inferno Tiara | 
|
3 | 50 | 279 | 1397 | 40 | 209 | 319 | 1606 | ||
| Ancient Hurricane Bracelet | 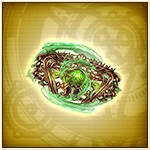
|
3 | 50 | 255 | 1276 | 40 | 187 | 295 | 1463 | ||
| Ancient Hurricane Brooch | 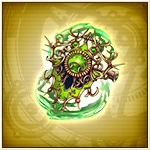
|
3 | 50 | 275 | 1375 | 40 | 198 | 315 | 1573 | ||
| Ancient Hurricane Earring | 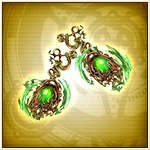
|
2 | 50 | 286 | 1430 | 40 | 202 | 326 | 1632 | ||
| Ancient Hurricane Necklace | 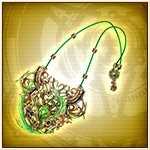
|
3 | 50 | 262 | 1309 | 40 | 172 | 302 | 1481 | ||
| Ancient Hurricane Ring | 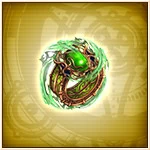
|
2 | 50 | 238 | 1188 | 40 | 158 | 278 | 1346 | ||
| Ancient Hurricane Tiara | 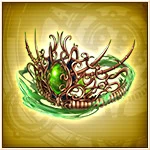
|
3 | 50 | 279 | 1397 | 40 | 209 | 319 | 1606 | ||
| Ancient Plasmic Bracelet | 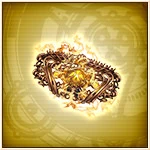
|
3 | 50 | 255 | 1276 | 40 | 187 | 295 | 1463 | ||
| Ancient Plasmic Brooch | 
|
3 | 50 | 275 | 1375 | 40 | 198 | 315 | 1573 | ||
| Ancient Plasmic Earring | 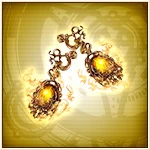
|
2 | 50 | 286 | 1430 | 40 | 202 | 326 | 1632 | ||
| Ancient Plasmic Necklace | 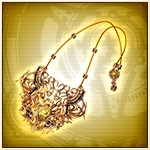
|
3 | 50 | 262 | 1309 | 40 | 172 | 302 | 1481 | ||
| Ancient Plasmic Ring | 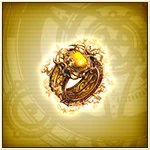
|
2 | 50 | 238 | 1188 | 40 | 158 | 278 | 1346 | ||
| Ancient Plasmic Tiara | 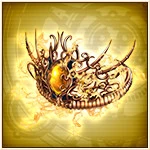
|
3 | 50 | 279 | 1397 | 40 | 209 | 319 | 1606 | ||
| Attack | HP | Total Power | |||||||||
|---|---|---|---|---|---|---|---|---|---|---|---|
| Name | Image | Rar. | Elem. | Effects | Max Lvl | Min | Max | Min | Max | Min | Max |
| Devil Deluge Bracelet | 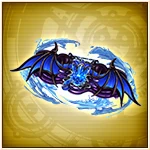
|
3 | 50 | 281 | 1404 | 40 | 206 | 321 | 1610 | ||
| Devil Deluge Brooch | 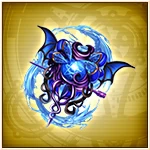
|
3 | 50 | 303 | 1513 | 40 | 218 | 343 | 1731 | ||
| Devil Deluge Earring | 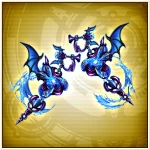
|
2 | 50 | 315 | 1573 | 40 | 223 | 355 | 1796 | ||
| Devil Deluge Necklace | 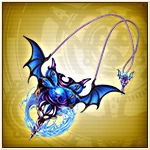
|
3 | 50 | 288 | 1440 | 40 | 189 | 328 | 1629 | ||
| Devil Deluge Ring | 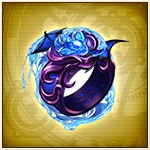
|
2 | 50 | 261 | 1307 | 40 | 174 | 301 | 1481 | ||
| Devil Deluge Tiara | 
|
3 | 50 | 307 | 1537 | 40 | 230 | 347 | 1767 | ||
| Devil Demonic Bracelet | 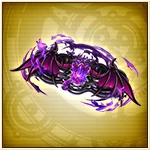
|
3 | 50 | 281 | 1404 | 40 | 206 | 321 | 1610 | ||
| Devil Demonic Brooch | 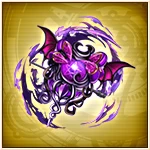
|
3 | 50 | 303 | 1513 | 40 | 218 | 343 | 1731 | ||
| Devil Demonic Earring | 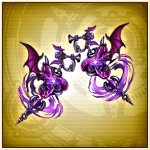
|
2 | 50 | 315 | 1573 | 40 | 223 | 355 | 1796 | ||
| Devil Demonic Necklace | 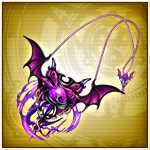
|
3 | 50 | 288 | 1440 | 40 | 189 | 328 | 1629 | ||
| Devil Demonic Ring | 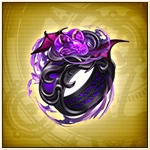
|
2 | 50 | 261 | 1307 | 40 | 174 | 301 | 1481 | ||
| Devil Demonic Tiara | 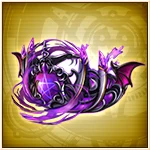
|
3 | 50 | 307 | 1537 | 40 | 230 | 347 | 1767 | ||
| Devil Divine Bracelet | 
|
3 | 50 | 281 | 1404 | 40 | 206 | 321 | 1610 | ||
| Devil Divine Brooch | 
|
3 | 50 | 303 | 1513 | 40 | 218 | 343 | 1731 | ||
| Devil Divine Earring | 
|
2 | 50 | 315 | 1573 | 40 | 223 | 355 | 1796 | ||
| Devil Divine Necklace | 
|
3 | 50 | 288 | 1440 | 40 | 189 | 328 | 1629 | ||
| Devil Divine Ring | 
|
2 | 50 | 261 | 1307 | 40 | 174 | 301 | 1481 | ||
| Devil Divine Tiara | 
|
3 | 50 | 307 | 1537 | 40 | 230 | 347 | 1767 | ||
| Devil Inferno Bracelet | 
|
3 | 50 | 281 | 1404 | 40 | 206 | 321 | 1610 | ||
| Devil Inferno Brooch | 
|
3 | 50 | 303 | 1513 | 40 | 218 | 343 | 1731 | ||
| Devil Inferno Earring | 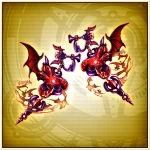
|
2 | 50 | 315 | 1573 | 40 | 223 | 355 | 1796 | ||
| Devil Inferno Necklace | 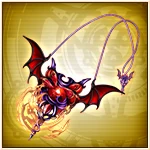
|
3 | 50 | 288 | 1440 | 40 | 189 | 328 | 1629 | ||
| Devil Inferno Ring | 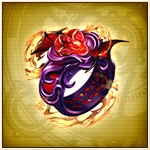
|
2 | 50 | 261 | 1307 | 40 | 174 | 301 | 1481 | ||
| Devil Inferno Tiara | 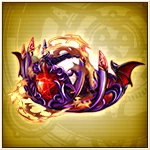
|
3 | 50 | 307 | 1537 | 40 | 230 | 347 | 1767 | ||
| Devil Hurricane Bracelet | 
|
3 | 50 | 281 | 1404 | 40 | 206 | 321 | 1610 | ||
| Devil Hurricane Brooch | 
|
3 | 50 | 303 | 1513 | 40 | 218 | 343 | 1731 | ||
| Devil Hurricane Earring | 
|
2 | 50 | 315 | 1573 | 40 | 223 | 355 | 1796 | ||
| Devil Hurricane Necklace | 
|
3 | 50 | 288 | 1440 | 40 | 189 | 328 | 1629 | ||
| Devil Hurricane Ring | 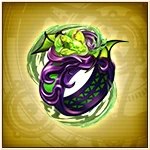
|
2 | 50 | 261 | 1307 | 40 | 174 | 301 | 1481 | ||
| Devil Hurricane Tiara | 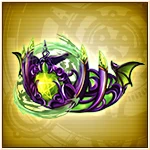
|
3 | 50 | 307 | 1537 | 40 | 230 | 347 | 1767 | ||
| Devil Plasmic Bracelet | 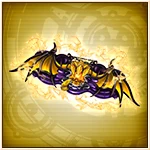
|
3 | 50 | 281 | 1404 | 40 | 206 | 321 | 1610 | ||
| Devil Plasmic Brooch | 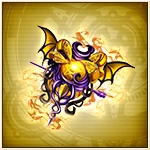
|
3 | 50 | 303 | 1513 | 40 | 218 | 343 | 1731 | ||
| Devil Plasmic Earring | 
|
2 | 50 | 315 | 1573 | 40 | 223 | 355 | 1796 | ||
| Devil Plasmic Necklace | 
|
3 | 50 | 288 | 1440 | 40 | 189 | 328 | 1629 | ||
| Devil Plasmic Ring | 
|
2 | 50 | 261 | 1307 | 40 | 174 | 301 | 1481 | ||
| Devil Plasmic Tiara | 
|
3 | 50 | 307 | 1537 | 40 | 230 | 347 | 1767 | ||
| Attack | HP | Total Power | |||||||||
|---|---|---|---|---|---|---|---|---|---|---|---|
| Name | Image | Rar. | Elem. | Effects | Max Lvl | Min | Max | Min | Max | Min | Max |
| Abyssal Bracelet |
|
2 | 40 | 152 | 760 | 24 | 126 | 176 | 886 | ||
| Abyssal Brooch |
|
2 | 40 | 158 | 790 | 28 | 134 | 186 | 924 | ||
| Abyssal Earring |
|
2 | 40 | 160 | 800 | 24 | 140 | 184 | 940 | ||
| Abyssal Necklace |
|
2 | 40 | 144 | 720 | 20 | 116 | 164 | 836 | ||
| Abyssal Ring |
|
1 | 40 | 142 | 710 | 20 | 106 | 162 | 816 | ||
| Abyssal Tiara |
|
2 | 40 | 156 | 780 | 28 | 150 | 184 | 930 | ||
| Ancient Deluge Bracelet |
|
3 | 50 | 255 | 1276 | 40 | 187 | 295 | 1463 | ||
| Ancient Deluge Brooch |
|
3 | 50 | 275 | 1375 | 40 | 198 | 315 | 1573 | ||
| Ancient Deluge Earring |
|
2 | 50 | 286 | 1430 | 40 | 202 | 326 | 1632 | ||
| Ancient Deluge Necklace |
|
3 | 50 | 262 | 1309 | 40 | 172 | 302 | 1481 | ||
| Ancient Deluge Ring |
|
2 | 50 | 238 | 1188 | 40 | 158 | 278 | 1346 | ||
| Ancient Deluge Tiara |
|
3 | 50 | 279 | 1397 | 40 | 209 | 319 | 1606 | ||
| Ancient Demonic Bracelet |
|
3 | 50 | 255 | 1276 | 40 | 187 | 295 | 1463 | ||
| Ancient Demonic Brooch |
|
3 | 50 | 275 | 1375 | 40 | 198 | 315 | 1573 | ||
| Ancient Demonic Earring |
|
2 | 50 | 286 | 1430 | 40 | 202 | 326 | 1632 | ||
| Ancient Demonic Necklace |
|
3 | 50 | 262 | 1309 | 40 | 172 | 302 | 1481 | ||
| Ancient Demonic Ring |
|
2 | 50 | 238 | 1188 | 40 | 158 | 278 | 1346 | ||
| Ancient Demonic Tiara |
|
3 | 50 | 279 | 1397 | 40 | 209 | 319 | 1606 | ||
| Ancient Divine Bracelet |
|
3 | 50 | 255 | 1276 | 40 | 187 | 295 | 1463 | ||
| Ancient Divine Brooch |
|
3 | 50 | 275 | 1375 | 40 | 198 | 315 | 1573 | ||
| Ancient Divine Earring |
|
2 | 50 | 286 | 1430 | 40 | 202 | 326 | 1632 | ||
| Ancient Divine Necklace |
|
3 | 50 | 262 | 1309 | 40 | 172 | 302 | 1481 | ||
| Ancient Divine Ring |
|
2 | 50 | 238 | 1188 | 40 | 158 | 278 | 1346 | ||
| Ancient Divine Tiara |
|
3 | 50 | 279 | 1397 | 40 | 209 | 319 | 1606 | ||
| Ancient Inferno Bracelet |
|
3 | 50 | 255 | 1276 | 40 | 187 | 295 | 1463 | ||
| Ancient Inferno Brooch |
|
3 | 50 | 275 | 1375 | 40 | 198 | 315 | 1573 | ||
| Ancient Inferno Earring |
|
2 | 50 | 286 | 1430 | 40 | 202 | 326 | 1632 | ||
| Ancient Inferno Necklace |
|
3 | 50 | 262 | 1309 | 40 | 172 | 302 | 1481 | ||
| Ancient Inferno Ring |
|
2 | 50 | 238 | 1188 | 40 | 158 | 278 | 1346 | ||
| Ancient Inferno Tiara |
|
3 | 50 | 279 | 1397 | 40 | 209 | 319 | 1606 | ||
| Ancient Hurricane Bracelet |
|
3 | 50 | 255 | 1276 | 40 | 187 | 295 | 1463 | ||
| Ancient Hurricane Brooch |
|
3 | 50 | 275 | 1375 | 40 | 198 | 315 | 1573 | ||
| Ancient Hurricane Earring |
|
2 | 50 | 286 | 1430 | 40 | 202 | 326 | 1632 | ||
| Ancient Hurricane Necklace |
|
3 | 50 | 262 | 1309 | 40 | 172 | 302 | 1481 | ||
| Ancient Hurricane Ring |
|
2 | 50 | 238 | 1188 | 40 | 158 | 278 | 1346 | ||
| Ancient Hurricane Tiara |
|
3 | 50 | 279 | 1397 | 40 | 209 | 319 | 1606 | ||
| Ancient Plasmic Bracelet |
|
3 | 50 | 255 | 1276 | 40 | 187 | 295 | 1463 | ||
| Ancient Plasmic Brooch |
|
3 | 50 | 275 | 1375 | 40 | 198 | 315 | 1573 | ||
| Ancient Plasmic Earring |
|
2 | 50 | 286 | 1430 | 40 | 202 | 326 | 1632 | ||
| Ancient Plasmic Necklace |
|
3 | 50 | 262 | 1309 | 40 | 172 | 302 | 1481 | ||
| Ancient Plasmic Ring |
|
2 | 50 | 238 | 1188 | 40 | 158 | 278 | 1346 | ||
| Ancient Plasmic Tiara |
|
3 | 50 | 279 | 1397 | 40 | 209 | 319 | 1606 | ||
| Devil Deluge Bracelet |
|
3 | 50 | 281 | 1404 | 40 | 206 | 321 | 1610 | ||
| Devil Deluge Brooch |
|
3 | 50 | 303 | 1513 | 40 | 218 | 343 | 1731 | ||
| Devil Deluge Earring |
|
2 | 50 | 315 | 1573 | 40 | 223 | 355 | 1796 | ||
| Devil Deluge Necklace |
|
3 | 50 | 288 | 1440 | 40 | 189 | 328 | 1629 | ||
| Devil Deluge Ring |
|
2 | 50 | 261 | 1307 | 40 | 174 | 301 | 1481 | ||
| Devil Deluge Tiara |
|
3 | 50 | 307 | 1537 | 40 | 230 | 347 | 1767 | ||
| Devil Demonic Bracelet |
|
3 | 50 | 281 | 1404 | 40 | 206 | 321 | 1610 | ||
| Devil Demonic Brooch |
|
3 | 50 | 303 | 1513 | 40 | 218 | 343 | 1731 | ||
| Devil Demonic Earring |
|
2 | 50 | 315 | 1573 | 40 | 223 | 355 | 1796 | ||
| Devil Demonic Necklace |
|
3 | 50 | 288 | 1440 | 40 | 189 | 328 | 1629 | ||
| Devil Demonic Ring |
|
2 | 50 | 261 | 1307 | 40 | 174 | 301 | 1481 | ||
| Devil Demonic Tiara |
|
3 | 50 | 307 | 1537 | 40 | 230 | 347 | 1767 | ||
| Devil Divine Bracelet |
|
3 | 50 | 281 | 1404 | 40 | 206 | 321 | 1610 | ||
| Devil Divine Brooch |
|
3 | 50 | 303 | 1513 | 40 | 218 | 343 | 1731 | ||
| Devil Divine Earring |
|
2 | 50 | 315 | 1573 | 40 | 223 | 355 | 1796 | ||
| Devil Divine Necklace |
|
3 | 50 | 288 | 1440 | 40 | 189 | 328 | 1629 | ||
| Devil Divine Ring |
|
2 | 50 | 261 | 1307 | 40 | 174 | 301 | 1481 | ||
| Devil Divine Tiara |
|
3 | 50 | 307 | 1537 | 40 | 230 | 347 | 1767 | ||
| Devil Inferno Bracelet |
|
3 | 50 | 281 | 1404 | 40 | 206 | 321 | 1610 | ||
| Devil Inferno Brooch |
|
3 | 50 | 303 | 1513 | 40 | 218 | 343 | 1731 | ||
| Devil Inferno Earring |
|
2 | 50 | 315 | 1573 | 40 | 223 | 355 | 1796 | ||
| Devil Inferno Necklace |
|
3 | 50 | 288 | 1440 | 40 | 189 | 328 | 1629 | ||
| Devil Inferno Ring |
|
2 | 50 | 261 | 1307 | 40 | 174 | 301 | 1481 | ||
| Devil Inferno Tiara |
|
3 | 50 | 307 | 1537 | 40 | 230 | 347 | 1767 | ||
| Devil Hurricane Bracelet |
|
3 | 50 | 281 | 1404 | 40 | 206 | 321 | 1610 | ||
| Devil Hurricane Brooch |
|
3 | 50 | 303 | 1513 | 40 | 218 | 343 | 1731 | ||
| Devil Hurricane Earring |
|
2 | 50 | 315 | 1573 | 40 | 223 | 355 | 1796 | ||
| Devil Hurricane Necklace |
|
3 | 50 | 288 | 1440 | 40 | 189 | 328 | 1629 | ||
| Devil Hurricane Ring |
|
2 | 50 | 261 | 1307 | 40 | 174 | 301 | 1481 | ||
| Devil Hurricane Tiara |
|
3 | 50 | 307 | 1537 | 40 | 230 | 347 | 1767 | ||
| Devil Plasmic Bracelet |
|
3 | 50 | 281 | 1404 | 40 | 206 | 321 | 1610 | ||
| Devil Plasmic Brooch |
|
3 | 50 | 303 | 1513 | 40 | 218 | 343 | 1731 | ||
| Devil Plasmic Earring |
|
2 | 50 | 315 | 1573 | 40 | 223 | 355 | 1796 | ||
| Devil Plasmic Necklace |
|
3 | 50 | 288 | 1440 | 40 | 189 | 328 | 1629 | ||
| Devil Plasmic Ring |
|
2 | 50 | 261 | 1307 | 40 | 174 | 301 | 1481 | ||
| Devil Plasmic Tiara |
|
3 | 50 | 307 | 1537 | 40 | 230 | 347 | 1767 | ||
| Blazing Bracelet |
|
2 | 40 | 152 | 760 | 24 | 126 | 176 | 886 | ||
| Blazing Brooch |
|
2 | 40 | 158 | 790 | 28 | 134 | 186 | 924 | ||
| Blazing Earring |
|
2 | 40 | 160 | 800 | 24 | 140 | 184 | 940 | ||
| Blazing Necklace |
|
2 | 40 | 144 | 720 | 20 | 116 | 164 | 836 | ||
| Blazing Ring |
|
1 | 40 | 142 | 710 | 20 | 106 | 162 | 816 | ||
| Blazing Tiara |
|
2 | 40 | 156 | 780 | 28 | 150 | 184 | 930 | ||
| Blustery Bracelet |
|
1 | 30 | 110 | 550 | 16 | 74 | 126 | 624 | ||
| Blustery Brooch |
|
1 | 30 | 118 | 590 | 20 | 84 | 138 | 674 | ||
| Blustery Earring |
|
1 | 30 | 120 | 600 | 16 | 90 | 136 | 690 | ||
| Blustery Necklace |
|
1 | 30 | 104 | 520 | 12 | 60 | 116 | 580 | ||
| Blustery Ring |
|
0 | 30 | 100 | 500 | 12 | 50 | 112 | 550 | ||
| Blustery Tiara |
|
1 | 30 | 114 | 570 | 10 | 100 | 124 | 670 | ||
| Brilliant Bracelet |
|
1 | 30 | 110 | 550 | 16 | 74 | 126 | 624 | ||
| Brilliant Brooch |
|
1 | 30 | 118 | 590 | 20 | 84 | 138 | 674 | ||
| Brilliant Earring |
|
1 | 30 | 120 | 600 | 16 | 90 | 136 | 690 | ||
| Brilliant Necklace |
|
1 | 30 | 104 | 520 | 12 | 60 | 116 | 580 | ||
| Brilliant Ring |
|
0 | 30 | 100 | 500 | 12 | 50 | 112 | 550 | ||
| Brilliant Tiara |
|
1 | 30 | 114 | 570 | 10 | 100 | 124 | 670 | ||
| Dark Bracelet |
|
0 | 20 | 72 | 360 | 8 | 38 | 80 | 398 | ||
| Dark Brooch |
|
0 | 20 | 78 | 390 | 12 | 42 | 90 | 432 | ||
| Dark Earring |
|
0 | 20 | 80 | 400 | 8 | 50 | 88 | 450 | ||
| Dark Necklace |
|
0 | 20 | 64 | 320 | 4 | 34 | 68 | 354 | ||
| Dark Ring |
|
0 | 20 | 60 | 300 | 4 | 30 | 64 | 330 | ||
| Dark Tiara |
|
0 | 20 | 72 | 360 | 12 | 50 | 84 | 410 | ||
| Deluge Bracelet |
|
3 | 50 | 232 | 1160 | 32 | 170 | 264 | 1330 | ||
| Deluge Brooch |
|
3 | 50 | 250 | 1250 | 36 | 180 | 286 | 1430 | ||
| Deluge Earring |
|
2 | 50 | 260 | 1300 | 40 | 184 | 300 | 1484 | ||
| Deluge Necklace |
|
3 | 50 | 238 | 1190 | 28 | 156 | 266 | 1346 | ||
| Deluge Ring |
|
2 | 50 | 216 | 1080 | 28 | 144 | 244 | 1224 | ||
| Deluge Tiara |
|
3 | 50 | 254 | 1270 | 40 | 190 | 294 | 1460 | ||
| Demonic Bracelet |
|
3 | 50 | 232 | 1160 | 32 | 170 | 264 | 1330 | ||
| Demonic Brooch |
|
3 | 50 | 250 | 1250 | 36 | 180 | 286 | 1430 | ||
| Demonic Earring |
|
2 | 50 | 260 | 1300 | 40 | 184 | 300 | 1484 | ||
| Demonic Necklace |
|
3 | 50 | 238 | 1190 | 28 | 156 | 266 | 1346 | ||
| Demonic Ring |
|
2 | 50 | 216 | 1080 | 28 | 144 | 244 | 1224 | ||
| Demonic Tiara |
|
3 | 50 | 254 | 1270 | 40 | 190 | 294 | 1460 | ||
| Divine Bracelet |
|
3 | 50 | 232 | 1160 | 32 | 170 | 264 | 1330 | ||
| Divine Brooch |
|
3 | 50 | 250 | 1250 | 36 | 180 | 286 | 1430 | ||
| Divine Earring |
|
2 | 50 | 260 | 1300 | 40 | 184 | 300 | 1484 | ||
| Divine Necklace |
|
3 | 50 | 238 | 1190 | 28 | 156 | 266 | 1346 | ||
| Divine Ring |
|
2 | 50 | 216 | 1080 | 28 | 144 | 244 | 1224 | ||
| Divine Tiara |
|
3 | 50 | 254 | 1270 | 40 | 190 | 294 | 1460 | ||
| Electrified Bracelet |
|
2 | 40 | 152 | 760 | 24 | 126 | 176 | 886 | ||
| Electrified Brooch |
|
2 | 40 | 158 | 790 | 28 | 134 | 186 | 924 | ||
| Electrified Earring |
|
2 | 40 | 160 | 800 | 24 | 140 | 184 | 940 | ||
| Electrified Necklace |
|
2 | 40 | 144 | 720 | 20 | 116 | 164 | 836 | ||
| Electrified Ring |
|
1 | 40 | 142 | 710 | 20 | 106 | 162 | 816 | ||
| Electrified Tiara |
|
2 | 40 | 156 | 780 | 28 | 150 | 184 | 930 | ||
| Fire Bracelet |
|
0 | 20 | 72 | 360 | 8 | 38 | 80 | 398 | ||
| Fire Brooch |
|
0 | 20 | 78 | 390 | 12 | 42 | 90 | 432 | ||
| Fire Earring |
|
0 | 20 | 80 | 400 | 8 | 50 | 88 | 450 | ||
| Fire Necklace |
|
0 | 20 | 64 | 320 | 4 | 34 | 68 | 354 | ||
| Fire Ring |
|
0 | 20 | 60 | 300 | 4 | 30 | 64 | 330 | ||
| Fire Tiara |
|
0 | 20 | 72 | 360 | 12 | 50 | 84 | 410 | ||
| Flowing Water Bracelet |
|
1 | 30 | 110 | 550 | 16 | 74 | 126 | 624 | ||
| Flowing Water Brooch |
|
1 | 30 | 118 | 590 | 20 | 84 | 138 | 674 | ||
| Flowing Water Earring |
|
1 | 30 | 120 | 600 | 16 | 90 | 136 | 690 | ||
| Flowing Water Necklace |
|
1 | 30 | 104 | 520 | 12 | 60 | 116 | 580 | ||
| Flowing Water Ring |
|
0 | 30 | 100 | 500 | 12 | 50 | 112 | 550 | ||
| Flowing Water Tiara |
|
1 | 30 | 114 | 570 | 10 | 100 | 124 | 670 | ||
| Gale Bracelet |
|
2 | 40 | 152 | 760 | 24 | 126 | 176 | 886 | ||
| Gale Brooch |
|
2 | 40 | 158 | 790 | 28 | 134 | 186 | 924 | ||
| Gale Earring |
|
2 | 40 | 160 | 800 | 24 | 140 | 184 | 940 | ||
| Gale Necklace |
|
2 | 40 | 144 | 720 | 20 | 116 | 164 | 836 | ||
| Gale Ring |
|
1 | 40 | 142 | 710 | 20 | 106 | 162 | 816 | ||
| Gale Tiara |
|
2 | 40 | 156 | 780 | 28 | 150 | 184 | 930 | ||
| Holy Light Bracelet |
|
2 | 40 | 152 | 760 | 24 | 126 | 176 | 886 | ||
| Holy Light Brooch |
|
2 | 40 | 158 | 790 | 28 | 134 | 186 | 924 | ||
| Holy Light Earring |
|
2 | 40 | 160 | 800 | 24 | 140 | 184 | 940 | ||
| Holy Light Necklace |
|
2 | 40 | 144 | 720 | 20 | 116 | 164 | 836 | ||
| Holy Light Ring |
|
1 | 40 | 142 | 710 | 20 | 106 | 162 | 816 | ||
| Holy Light Tiara |
|
2 | 40 | 156 | 780 | 28 | 150 | 184 | 930 | ||
| Hurricane Bracelet |
|
3 | 50 | 232 | 1160 | 32 | 170 | 264 | 1330 | ||
| Hurricane Brooch |
|
3 | 50 | 250 | 1250 | 36 | 180 | 286 | 1430 | ||
| Hurricane Earring |
|
2 | 50 | 260 | 1300 | 40 | 184 | 300 | 1484 | ||
| Hurricane Necklace |
|
3 | 50 | 238 | 1190 | 28 | 156 | 266 | 1346 | ||
| Hurricane Ring |
|
2 | 50 | 216 | 1080 | 28 | 144 | 244 | 1224 | ||
| Hurricane Tiara |
|
3 | 50 | 254 | 1270 | 40 | 190 | 294 | 1460 | ||
| Inferno Bracelet |
|
3 | 50 | 232 | 1160 | 32 | 170 | 264 | 1330 | ||
| Inferno Brooch |
|
3 | 50 | 250 | 1250 | 36 | 180 | 286 | 1430 | ||
| Inferno Earring |
|
2 | 50 | 260 | 1300 | 40 | 184 | 300 | 1484 | ||
| Inferno Necklace |
|
3 | 50 | 238 | 1190 | 28 | 156 | 266 | 1346 | ||
| Inferno Ring |
|
2 | 50 | 216 | 1080 | 28 | 144 | 244 | 1224 | ||
| Inferno Tiara |
|
3 | 50 | 254 | 1270 | 40 | 190 | 294 | 1460 | ||
| Light Bracelet |
|
0 | 20 | 72 | 360 | 8 | 38 | 80 | 398 | ||
| Light Brooch |
|
0 | 20 | 78 | 390 | 12 | 42 | 90 | 432 | ||
| Light Earring |
|
0 | 20 | 80 | 400 | 8 | 50 | 88 | 450 | ||
| Light Necklace |
|
0 | 20 | 64 | 320 | 4 | 34 | 68 | 354 | ||
| Light Ring |
|
0 | 20 | 60 | 300 | 4 | 30 | 64 | 330 | ||
| Light Tiara |
|
0 | 20 | 72 | 360 | 12 | 50 | 84 | 410 | ||
| Plasmic Bracelet |
|
3 | 50 | 232 | 1160 | 32 | 170 | 264 | 1330 | ||
| Plasmic Brooch |
|
3 | 50 | 250 | 1250 | 36 | 180 | 286 | 1430 | ||
| Plasmic Earring |
|
2 | 50 | 260 | 1300 | 40 | 184 | 300 | 1484 | ||
| Plasmic Necklace |
|
3 | 50 | 238 | 1190 | 28 | 156 | 266 | 1346 | ||
| Plasmic Ring |
|
2 | 50 | 216 | 1080 | 28 | 144 | 244 | 1224 | ||
| Plasmic Tiara |
|
3 | 50 | 254 | 1270 | 40 | 190 | 294 | 1460 | ||
| Raging Fire Bracelet |
|
1 | 30 | 110 | 550 | 16 | 74 | 126 | 624 | ||
| Raging Fire Brooch |
|
1 | 30 | 118 | 590 | 20 | 84 | 138 | 674 | ||
| Raging Fire Earring |
|
1 | 30 | 120 | 600 | 16 | 90 | 136 | 690 | ||
| Raging Fire Necklace |
|
1 | 30 | 104 | 520 | 12 | 60 | 116 | 580 | ||
| Raging Fire Ring |
|
0 | 30 | 100 | 500 | 12 | 50 | 112 | 550 | ||
| Raging Fire Tiara |
|
1 | 30 | 114 | 570 | 10 | 100 | 124 | 670 | ||
| Rushing Water Bracelet |
|
2 | 40 | 152 | 760 | 24 | 126 | 176 | 886 | ||
| Rushing Water Brooch |
|
2 | 40 | 158 | 790 | 28 | 134 | 186 | 924 | ||
| Rushing Water Earring |
|
2 | 40 | 160 | 800 | 24 | 140 | 184 | 940 | ||
| Rushing Water Necklace |
|
2 | 40 | 144 | 720 | 20 | 116 | 164 | 836 | ||
| Rushing Water Ring |
|
1 | 40 | 142 | 710 | 20 | 106 | 162 | 816 | ||
| Rushing Water Tiara |
|
2 | 40 | 156 | 780 | 28 | 150 | 184 | 930 | ||
| Shadow Bracelet |
|
1 | 30 | 110 | 550 | 16 | 74 | 126 | 624 | ||
| Shadow Brooch |
|
1 | 30 | 118 | 590 | 20 | 84 | 138 | 674 | ||
| Shadow Earring |
|
1 | 30 | 120 | 600 | 16 | 90 | 136 | 690 | ||
| Shadow Necklace |
|
1 | 30 | 104 | 520 | 12 | 60 | 116 | 580 | ||
| Shadow Ring |
|
0 | 30 | 100 | 500 | 12 | 50 | 112 | 550 | ||
| Shadow Tiara |
|
1 | 30 | 114 | 570 | 10 | 100 | 124 | 670 | ||
| Storm Bracelet |
|
1 | 30 | 110 | 550 | 16 | 74 | 126 | 624 | ||
| Storm Brooch |
|
1 | 30 | 118 | 590 | 20 | 84 | 138 | 674 | ||
| Storm Earring |
|
1 | 30 | 120 | 600 | 16 | 90 | 136 | 690 | ||
| Storm Necklace |
|
1 | 30 | 104 | 520 | 12 | 60 | 116 | 580 | ||
| Storm Ring |
|
0 | 30 | 100 | 500 | 12 | 50 | 112 | 550 | ||
| Storm Tiara |
|
1 | 30 | 114 | 570 | 10 | 100 | 124 | 670 | ||
| Thunder Bracelet |
|
0 | 20 | 72 | 360 | 8 | 38 | 80 | 398 | ||
| Thunder Brooch |
|
0 | 20 | 78 | 390 | 12 | 42 | 90 | 432 | ||
| Thunder Earring |
|
0 | 20 | 80 | 400 | 8 | 50 | 88 | 450 | ||
| Thunder Necklace |
|
0 | 20 | 64 | 320 | 4 | 34 | 68 | 354 | ||
| Thunder Ring |
|
0 | 20 | 60 | 300 | 4 | 30 | 64 | 330 | ||
| Thunder Tiara |
|
0 | 20 | 72 | 360 | 12 | 50 | 84 | 410 | ||
| Water Bracelet |
|
0 | 20 | 72 | 360 | 8 | 38 | 80 | 398 | ||
| Water Brooch |
|
0 | 20 | 78 | 390 | 12 | 42 | 90 | 432 | ||
| Water Earring |
|
0 | 20 | 80 | 400 | 8 | 50 | 88 | 450 | ||
| Water Necklace |
|
0 | 20 | 64 | 320 | 4 | 34 | 68 | 354 | ||
| Water Ring |
|
0 | 20 | 60 | 300 | 4 | 30 | 64 | 330 | ||
| Water Tiara |
|
0 | 20 | 72 | 360 | 12 | 50 | 84 | 410 | ||
| Wind Bracelet |
|
0 | 20 | 72 | 360 | 8 | 38 | 80 | 398 | ||
| Wind Brooch |
|
0 | 20 | 78 | 390 | 12 | 42 | 90 | 432 | ||
| Wind Earring |
|
0 | 20 | 80 | 400 | 8 | 50 | 88 | 450 | ||
| Wind Necklace |
|
0 | 20 | 64 | 320 | 4 | 34 | 68 | 354 | ||
| Wind Ring |
|
0 | 20 | 60 | 300 | 4 | 30 | 64 | 330 | ||
| Wind Tiara |
|
0 | 20 | 72 | 360 | 12 | 50 | 84 | 410 | ||