(Fix) Tag: Source edit |
|||
| (41 intermediate revisions by 6 users not shown) | |||
| Line 1: | Line 1: | ||
| + | |||
| − | == Saint Nicholas [Shadow] == |
||
| − | [[File: |
+ | [[File:Guild Receptionist.png|thumb|right|Guild Receptionist]] |
| + | Bounty which is distributed through the Guild, will bring forth very strong enemies to be challenged through this permanent content. You have 14 days of time to defeat the enemy in the Bounty and accomplishing determinated missions you obtain points to exchange with rewards. Guild Order can be accessed from Rank 51 and above. |
||
| − | {| class="BandedRows" |
||
| + | |||
| − | ! Enemy !! HP !! Overdrive Meter !! colspan="2" | Overdrive / Abilities |
||
| + | == Mechanics == |
||
| − | |- class="even" |
||
| + | * The enemy written on the Bounty can be challenged max. 7 times in a week without use Elixirs. |
||
| − | ! colspan="5" | Stage 1 |
||
| + | * If your party is defeated the game allow to continue the battle where you have left (like in Tower Event). |
||
| − | |- class="even" |
||
| + | * Every week there are 10 missions and for each completed you get 1 point. |
||
| − | | [[File:Zantman Small Portrait.png]]<br />Gargoyle || 650.000 || 1 || colspan="2" style="text-align:left;padding-left:5px;" | Applies {{Icon|paralysis}} Paralysis to one enemy |
||
| + | * The missions will change after 7 days, but the accumulated points don't reset. |
||
| − | |- class="even" |
||
| + | * Points accumulated can be exchanged for rewards and they will remain intact until the Guild change enemy. |
||
| − | | [[File:Pixie Small Portrait.png]]<br />Gremlin || 650.000 || 1 || colspan="2" style="text-align:left;padding-left:5px;" | Applies {{Icon|dizzy}} Dizzy to two enemies |
||
| + | * According the element enemy you can obtain 2 SSR Weapons of Auricalcum series. |
||
| − | |- class="even" |
||
| + | |||
| − | | [[File:Satyr Small Portrait.png]]<br />Homunculus || 1.100.000 || 2 || colspan="2" style="text-align:left;padding-left:5px;" | Deals ~2000 DMG to three enemies. Enemies afflicted with Paralysis or Dizzy take an extra ~2000 DMG |
||
| + | === Previous Mechanics === |
||
| + | * The enemy written on the Bounty can be challenged once per day without use Elixirs. |
||
| + | * If your party is defeated you need wait the next day before start a new battle. |
||
| + | * Every week there are 10 missions and for each completed you get 1 point. |
||
| + | * Both rewards and missions will change after 7 days and the accumulated points is also reset. |
||
| + | * Points accumulated can be exchanged for rewards, but after 7 days previous rewards cannot be claimed. |
||
| + | * Until November 1st 2020 it was possible to obtain 800 Magic Jewels. |
||
| + | |||
| + | {| class="BandedRows" style="width:auto;" cellpadding="5" align="center" |
||
| + | ! Mission<br />Points !! colspan="2" | Reward !! Mission<br />Points !! colspan="2" | Reward |
||
|- |
|- |
||
| + | | 1 || style="width:50px;padding: 0px;" | [[File:Half Elixir.jpg|50px]] || 5 x Half Elixir |
||
| − | ! colspan="5" | Stage 2 |
||
| + | | 8 || style="width:50px;padding: 0px;" | || 1 x SSR Auricalcum weapon series,<br />(see below) |
||
|- |
|- |
||
| + | | 2 || style="padding: 0px;" | [[File:Energy Seed.jpg|50px]] || 15 x Energy Seed |
||
| − | | rowspan="2" | [[File:Slime Small Portrait.png]]<br />Sirrush Passion || rowspan="2" | 950.000 || rowspan="2" | 2 || Overdrive || style="text-align:left;padding-left:5px;" | Applies {{Icon|blinded}} Blinded (Strong) to all enemies and Burst Gauge↓ (-20%) |
||
| + | | 10 || style="padding: 0px;" | [[File:Orichalcon.jpg|50px]] || 1 x Orichalcon |
||
|- |
|- |
||
| + | | 3 || style="padding: 0px;" | [[File:Evolved Grimoire.jpg|50px]] || 1 x Evolved Grimoire |
||
| − | | Triggered Ability<br />(First turn) |
||
| − | | style=" |
+ | | 12 || style="padding: 0px;" | [[File:Evolved Grimoire.jpg|50px]] || 2 x Evolved Grimoire |
|- |
|- |
||
| + | | 4 || style="padding: 0px;" | || 1 x SSR Auricalcum weapon series,<br />(see below) |
||
| − | | [[File:Serket Small Portrait.png]]<br />Tamiel || 600.000 || 2 || colspan="2" style="text-align:left;padding-left:5px;" | Applies {{Icon|poisoned}} Poisoned (5T) to all enemies |
||
| + | | 15 || style="padding: 0px;" | [[File:Grimoire of Apotheosis.jpg|50px]] || 2 x Grimoire of Apotheosis |
||
|- |
|- |
||
| + | | 5 || style="padding: 0px;" | [[File:Grimoire of Apotheosis.jpg|50px]] || 1 x Grimoire of Apotheosis |
||
| − | | [[File:Kunumu Small Portrait.png]]<br />Samyaza|| 650.000 || 2 || colspan="2" style="text-align:left;padding-left:5px;" | Deals water DMG to all enemies |
||
| + | | 18 || style="padding: 0px;" | [[File:Orichalcon.jpg|50px]] || 1 x Orichalcon |
||
| − | |- class="even" |
||
| − | ! colspan="5" | Stage 3 |
||
| − | |- class="even" |
||
| − | | [[File:Luminous Demogorgon Small Portrait.png]]<br />Luminous Demogorgon || 3.000.000 || 2 || colspan="2" style="text-align:left;padding-left:5px;" | Deals medium DMG to five random enemies |
||
|- |
|- |
||
| + | | 6 || style="padding: 0px;" | [[File:Orichalcon.jpg|50px]] || 1 x Orichalcon |
||
| − | ! colspan="5" | Stage 4 |
||
| + | | 20 || style="padding: 0px;" | [[File:Orichalcon.jpg|50px]] || 2 x Orichalcon |
||
| − | |- |
||
| − | | [[File:Sirrush Hypocrisy Small Portrait.png]]<br />Sirrush Hypocrisy || 800.000 || 3 || colspan="2" style="text-align:left;padding-left:5px;" | Deals high damage to all enemies and applies {{Icon|combo_up}} Combo Rate↑ to all allies |
||
| − | |- |
||
| − | | [[File:Luminous Demogorgon Small Portrait.png]]<br />Shine Gorgon || 2.00.000 || 3 || colspan="2" style="text-align:left;padding-left:5px;" | Deals ~3.000 DMG to four times to random enemies |
||
| − | |- |
||
| − | | [[File:Light Knight Bellis Small Portrait.png]]<br />Light Knight Bellis || 1.200.000 || 1 || colspan="2" style="text-align:left;padding-left:5px;" | Applies {{Icon|def_up}} DMG Cut (100%, 2 times) to all allies |
||
| − | |- class="even" |
||
| − | ! colspan="5" | Stage 5 |
||
| − | |- class="even" |
||
| − | | rowspan="3" | [[File:Saint Nicholas Small Portrait.png|60px]]<br />Saint Nicholas [Shadow] |
||
| − | | rowspan="3" | 7.500.000 |
||
| − | | rowspan="3" | 2 |
||
| − | | Normal Overdrive || style="text-align:left;padding-left:5px;" | Deals ~3000 DMG to three enemies and applies {{Icon|atk_up}} ATK↑ to self |
||
| − | |- class="even" |
||
| − | | Raging Overdrive |
||
| − | | style="text-align:left;padding-left:5px;" | Deals [~1500 x Number of debuffs] to all enemies |
||
| − | |- class="even" |
||
| − | | Triggered Ability<br />(First turn) |
||
| − | | style="text-align:left;padding-left:5px;" | Applies a 10.000 HP {{Icon|regen}} Regeneration (Permanent. Cannot be dispelled) and {{Icon|def_down}} DEF↓ (-23%. Permanent) to self |
||
|} |
|} |
||
| − | '''Notes:''' |
||
| − | * Saint Nicholas have 13 base DEF (Standard value is 10). |
||
| + | Depending on Element's enemies you get: |
||
| − | == Yggdrasil [Shadow] == |
||
| + | {| class="BandedRows" style="width:auto;" cellpadding="6" align="center" |
||
| − | [[File: Yggdrasil Bounty.png|center|x200px]] |
||
| + | ! Fire !! Water !! Wind !! Thunder !! Light !! Dark |
||
| − | {| class="BandedRows" |
||
| − | ! Enemy !! HP !! Overdrive Meter !! colspan="2" | Overdrive / Abilities |
||
| − | |- class="even" |
||
| − | ! colspan="5" | Stage 1 |
||
| − | |- class="even" |
||
| − | | [[File:Gargoyle Small Portrait.png]]<br />Gargoyle || 600.000 || 3 || colspan="2" style="text-align:left;padding-left:5px;" | Applies {{Icon|def_up}} DEF↑ and {{Icon|wind_up}} Wind RST↑ to all allies<br />(Note: Also uses it on her first turn) |
||
| − | |- class="even" |
||
| − | | rowspan="2" | [[File:Gremlin Small Portrait.png]]<br />Gremlin || rowspan="2" | 600.000 || rowspan="2" | 3 || Overdrive || style="text-align:left;padding-left:5px;" | Applies {{Icon|paralysis}} Paralysis (1T) and {{Icon|thunder_down}} Thunder RST↓ (1T) to all enemies and, {{Icon|def_down}} DEF↓, {{Icon|wind_down}} Wind RST↓ and {{Icon|affliction_immune}} Affliction Immunity to self |
||
| − | |- class="even" |
||
| − | | Triggered Ability<br />(After overdrive) |
||
| − | | style="text-align:left;padding-left:5px;" | Deals high DMG six times to random enemies. |
||
| − | |- class="even" |
||
| − | | [[File:Homunculus Small Portrait.png]]<br />Homunculus || 500.000 || 1 || colspan="2" style="text-align:left;padding-left:5px;" | Heals 20% of allies max HP |
||
|- |
|- |
||
| + | | [[File:Inflamation Gun Auricalcum Portrait.jpg|50px]]<br />[[Inflamation Gun Auricalcum]] |
||
| − | ! colspan="5" | Stage 2 |
||
| + | | [[File:Zero Freeze Hammer Auricalcum Portrait.jpg|50px]]<br />[[Zero Freeze Hammer Auricalcum]] |
||
| − | |- |
||
| + | | [[File:Revolutionary Arcane Auricalcum Portrait.jpg|50px]]<br />[[Revolutionary Arcane Auricalcum]] |
||
| − | | [[File:Penem Small Portrait.png]]<br />Penem || 800.000 || 2 || colspan="2" style="text-align:left;padding-left:5px;" | Reduces current HP of one enemy by 50% |
||
| + | | [[File:Thunderclap Bow Auricalcum Portrait.jpg|50px]]<br />[[Thunderclap Bow Auricalcum]] |
||
| − | |- |
||
| + | | [[File:Brilliance Glaive Auricalcum Portrait.jpg|50px]]<br />[[Brilliance Glaive Auricalcum]] |
||
| − | | [[File:Tamiel Small Portrait.png]]<br />Tamiel || 550.000 || 3 || colspan="2" style="text-align:left;padding-left:5px;" | Deals high DMG to one enemy |
||
| + | | [[File:Pitch Dark Axe Auricalcum Portrait.jpg|50px]]<br />[[Pitch Dark Axe Auricalcum]] |
||
| − | |- |
||
| − | | [[File:Samyaza Small Portrait.png]]<br />Samyaza|| 800.000 || 2 || colspan="2" style="text-align:left;padding-left:5px;" | Applies {{Icon|taunt}} Taunt and {{Icon|def_down}} DEF↓ to otne enemy |
||
| − | |- class="even" |
||
| − | ! colspan="5" | Stage 3 |
||
| − | |- class="even" |
||
| − | | [[File:Electro Demogorgon Small Portrait.png]]<br />Electro Demogorgon || 3.000.000 || 2 || colspan="2" style="text-align:left;padding-left:5px;" | Deals medium DMG to five random enemies |
||
| − | |- |
||
| − | ! colspan="5" | Stage 4 |
||
| − | |- |
||
| − | | [[File:Sirrush Passion Small Portrait.png]]<br />Sirrush Passion || 700.000 || 3 || colspan="2" style="text-align:left;padding-left:5px;" | Deals high damage to all enemies and applies {{Icon|combo_up}} Combo Rate↑ to all allies |
||
| − | |- |
||
| − | | [[File:Electro Demogorgon Small Portrait.png]]<br />Blitz Gorgon || 1.700.000 || 3 || colspan="2" style="text-align:left;padding-left:5px;" | Deals ~3.000 DMG to four times to random enemies |
||
| − | |- |
||
| − | | [[File:Thunder Knight Bellis Small Portrait.png]]<br />Thunder Knight Bellis || 1.200.000 || 1 || colspan="2" style="text-align:left;padding-left:5px;" | Applies {{Icon|def_up}} DMG Cut (100%, 2 times) to all allies |
||
| − | |- class="even" |
||
| − | ! colspan="5" | Stage 5 |
||
| − | |- class="even" |
||
| − | | rowspan="3" | [[File:Yggdrasil Small Portrait.png]]<br />Yggdrasil [Shadow] |
||
| − | | rowspan="3" | 8.500.000 |
||
| − | | rowspan="3" | 2 |
||
| − | | Normal Overdrive || style="text-align:left;padding-left:5px;" | Deals low DMG to all enemies and applies {{Icon|cursed}} Cursed |
||
| − | |- class="even" |
||
| − | | Raging Overdrive |
||
| − | | style="text-align:left;padding-left:5px;" | Reduces enemies' current HP by 70% and, applies {{Icon|poisoned}} Poisoned and {{Icon|Putrefied}} Putrefied |
||
| − | |- class="even" |
||
| − | | Triggered Ability<br />(Bellow 30% HP + Overdrive meter full) |
||
| − | | style="text-align:left;padding-left:5px;" | Deals extreme DMG to one enemy |
||
|} |
|} |
||
| − | == |
+ | == Bounty List == |
| + | The Bounty list goes from left to right and arrived at end of Cycle 2 restart from beginning of Cycle 1. |
||
| − | [[File: Quetzalcoatl Bounty.png|center|x200px]] |
||
| − | {| class="BandedRows" |
+ | {| class="BandedRows" align="center" style="vertical-align:middle;text-align:center;" |
| + | ! style="border:0px;width:120px;background:none" | |
||
| − | ! Enemy !! HP !! Overdrive Meter !! colspan="2" | Overdrive / Abilities |
||
| + | ! style="border:0px;width:120px;background:none" | |
||
| − | |- class="even" |
||
| + | ! style="border:0px;width:120px;background:none" | |
||
| − | ! colspan="5" | Stage 1 |
||
| + | ! style="border:0px;width:120px;background:none" | |
||
| − | |- class="even" |
||
| + | ! style="border:0px;width:120px;background:none" | |
||
| − | | [[File:Wood Nymph Small Portrait.png]]<br />Wood Nymph || 600.000 || 2 || colspan="2" style="text-align:left;padding-left:5px;" | Applies {{Icon|putrefied}} Putrefied (1250 DMG) and {{Icon|paralysis}} Paralyze (3T) |
||
| + | ! style="border:0px;width:120px;background:none" | |
||
| − | |- class="even" |
||
| − | | [[File:Ent Small Portrait.png]]<br />Ent|| 1.000.000 || 3 || colspan="2" style="text-align:left;padding-left:5px;" | Applies {{Icon|def_up}} DEF↑ (+100%) and a 200.000 HP {{Icon|regen}} Regeneration to self |
||
| − | |- class="even" |
||
| − | | [[File:Sylph Small Portrait.png]]<br />Sylph || 700.000 || 2 || colspan="2" style="text-align:left;padding-left:5px;" | Applies {{Icon|poisoned}} Poisoned (10% of max HP. 5T) and {{Icon|dizzy}} Dizzy (3T) |
||
|- |
|- |
||
| − | ! colspan=" |
+ | ! colspan="6" | Cycle 1 (Multiple Enemies per wave) |
|- |
|- |
||
| + | | [[File:Crom Cruach Portrait.png|100px|link=Guild Order/Crom Cruach (Shadow)]]<br />[[Guild Order/Crom Cruach (Shadow)|Crom Cruach<br />(Shadow)]] |
||
| − | | [[File:Typhoon Small Portrait.png]]<br />Senri || 400.000 || 2 || colspan="2" style="text-align:left;padding-left:5px;" | Applies {{Icon|atk_down}} ATK↓ and {{Icon|triple_down}}{{Icon|triple_down}} Combo Rate↓ |
||
| + | | [[File:Jormungandr Portrait.png|100px|link=Guild Order/Jormungandr (Shadow)]]<br />[[Guild Order/Jormungandr (Shadow)|Jormungandr<br />(Shadow)]] |
||
| − | |- |
||
| + | | [[File:Quetzalcoatl Portrait.png|100px|link=Guild Order/Quetzalcoatl (Shadow)]]<br />[[Guild Order/Quetzalcoatl (Shadow)|Quetzalcoatl<br />(Shadow)]] |
||
| − | | rowspan="2" | [[File:Werecat Small Portrait.png]]<br />Werecat || rowspan="2" | 1.200.000 || rowspan="2" | 3 || Overdrive || style="text-align:left;padding-left:5px;" | Deals medium DMG to all enemies and applies {{Icon|cursed}} Cursed (4T) |
||
| + | | [[File:Yggdrasil Portrait.png|100px|link=Guild Order/Yggdrasil (Shadow)]]<br />[[Guild Order/Yggdrasil (Shadow)|Yggdrasil<br />(Shadow)]] |
||
| − | |- |
||
| + | | [[File:Saint Nicholas Portrait.png|100px|link=Guild Order/Saint Nicholas (Shadow)]]<br />[[Guild Order/Saint Nicholas (Shadow)|Saint Nicholas<br />(Shadow)]] |
||
| − | | Ability |
||
| + | | [[File:Dullahan Portrait.png|100px|link=Guild Order/Dullahan (Shadow)]]<br />[[Guild Order/Dullahan (Shadow)|Dullahan<br />(Shadow)]] |
||
| − | | style="text-align:left;padding-left:5px;" | Applies {{Icon|atk_up}} ATK↑ and {{Icon|def_up}} DEF↑ to self (stackable)<br />''Note: She will use this ability if her overdrive meter is not full.'' |
||
| − | |- |
||
| − | | [[File:Senri Small Portrait.png]]<br />Typhoon|| 450.000 || 1 || colspan="2" style="text-align:left;padding-left:5px;" | Rermoves -35% Burst Gauge and dispels 1 buff to all enemies |
||
| − | |- class="even" |
||
| − | ! colspan="5" | Stage 3 |
||
| − | |- class="even" |
||
| − | | [[File:Gale Demogorgon Small Portrait.png]]<br />Gale Demogorgon || 3.000.000 || 2 || colspan="2" style="text-align:left;padding-left:5px;" | Deals medium DMG to five random enemies |
||
| − | |- |
||
| − | ! colspan="5" | Stage 4 |
||
| − | |- |
||
| − | | [[File:Sirrush Delight Small Portrait.png]]<br />Sirrush Delight || 800.000 || 3 || colspan="2" style="text-align:left;padding-left:5px;" | Deals high damage to all enemies and applies {{Icon|combo_up}} Combo Rate↑ to all allies |
||
| − | |- |
||
| − | | [[File:Gale Demogorgon Small Portrait.png]]<br />Van Gorgon || 1.900.000 || 3 || colspan="2" style="text-align:left;padding-left:5px;" | Deals ~3.000 DMG to four random enemies |
||
| − | |- |
||
| − | | [[File:Wind Knight Bellis Small Portrait.png]]<br />Wind Knight Bellis || 1.500.000 || 1 || colspan="2" style="text-align:left;padding-left:5px;" | Applies {{Icon|def_up}} DMG Cut (100%, 2 times) to all allies |
||
| − | |- class="even" |
||
| − | ! colspan="5" | Stage 5 |
||
| − | |- class="even" |
||
| − | | rowspan="4" | [[File:Quetzalcoatl Small Portrait.png]]<br />Quetzalcoatl [Shadow] |
||
| − | | rowspan="4" | 8.000.000 |
||
| − | | rowspan="4" | 3 |
||
| − | | Normal Overdrive || style="text-align:left;padding-left:5px;" | Deals ~3.000 DMG to three random enemies |
||
| − | |- class="even" |
||
| − | | Raging Overdrive |
||
| − | | style="text-align:left;padding-left:5px;" | Deals ~6.000 DMG to all enemies and applies {{Icon|def_down}} DEF↓ |
||
| − | |- class="even" |
||
| − | | Triggered Ability 1<br />(First turn / Below 50% HP) |
||
| − | | style="text-align:left;padding-left:5px;" | Applies {{Icon|combo_up}} Combo Rate↑ (240s) |
||
| − | |- class="even" |
||
| − | | Triggered Ability 2<br />(Inflicted with {{Icon|dizzy}} Dizzy) |
||
| − | | style="text-align:left;padding-left:5px;" | Cleanses three debuffs |
||
|} |
|} |
||
| + | |||
| − | == Jormungandr [Shadow] == |
||
| + | {| class="BandedRows" align="center" style="vertical-align:middle;text-align:center;" |
||
| − | [[File: Jormungandr Bounty.png|center|x200px]] |
||
| + | ! style="border:0px;width:120px;background:none" | |
||
| − | {| class="BandedRows" |
||
| + | ! style="border:0px;width:120px;background:none" | |
||
| − | ! Enemy !! HP !! Overdrive Meter !! colspan="2" | Overdrive / Abilities |
||
| + | ! style="border:0px;width:120px;background:none" | |
||
| − | |- class="even" |
||
| + | ! style="border:0px;width:120px;background:none" | |
||
| − | ! colspan="5" | Stage 1 |
||
| + | ! style="border:0px;width:120px;background:none" | |
||
| − | |- class="even" |
||
| + | ! style="border:0px;width:120px;background:none" | |
||
| − | | [[File:Lorelei Small Portrait.png]]<br />Lorelei || 650.000 || 1 || colspan="2" style="text-align:left;padding-left:5px;" | Deals DMG to all enemies and applies {{Icon|drowned}} Drowned (2 turns) |
||
| − | |- class="even" |
||
| − | | [[File:Sea SerpentPortrait.png]]<br />Sea Serpent || 650.000 || 2 || colspan="2" style="text-align:left;padding-left:5px;" | Applies {{Icon|def_down}} DEF↓ (5 turns. stackable) to all enemies |
||
| − | |- class="even" |
||
| − | | [[File:Mermaid Small Portrait.png]]<br />Mermaid || 900.000 || 3 || colspan="2" style="text-align:left;padding-left:5px;" | Deals very high DMG to one enemy |
||
|- |
|- |
||
| − | ! colspan=" |
+ | ! colspan="6" | Cycle 2 (Miniboss Rush) |
|- |
|- |
||
| + | | [[File:Cthugha Portrait.png|100px|link=Guild Order/Cthugha (Shadow)]]<br />[[Guild Order/Cthugha (Shadow)|Cthugha<br />(Shadow)]] |
||
| − | | rowspan="2" | [[File:Kraken Small Portrait.png]]<br />Kraken || rowspan="2" | 1.000.000 || rowspan="2" | 1 || Overdrive || Deals high DMG to 1 enemy |
||
| + | | [[File:Reiki Portrait.png|100px|link=Guild Order/Spirit Turtle (Shadow)]]<br />[[Guild Order/Spirit Turtle (Shadow)|Spirit Turtle<br />[Reiki] (Shadow)]] |
||
| − | |- |
||
| + | | [[File:Icarus Portrait.png|100px|link=Guild Order/Icarus (Shadow)]]<br />[[Guild Order/Icarus (Shadow)|Icarus<br />(Shadow)]] |
||
| − | | Triggered ability<br />(After being hit by burst attack) || Applies {{Icon|blinded}} Blind to one random enemy |
||
| + | | [[File:Sandalphon Portrait.png|100px|link=Guild Order/Sandalphon (Shadow)]]<br />[[Guild Order/Sandalphon (Shadow)|Sandalphon<br />(Shadow)]] |
||
| − | |- |
||
| + | | [[File:Barong Portrait.png|100px|link=Guild Order/Barong (Shadow)]]<br />[[Guild Order/Barong (Shadow)|Barong<br />(Shadow)]] |
||
| − | | [[File:Sea SerpentPortrait.png]]<br />Sea Serpent || 450.000 || 2 || colspan="2" style="text-align:left;padding-left:5px;" | Applies {{Icon|atk_down}} ATK↓ (5 turns. stackable) to all enemies |
||
| + | | [[File:Jack O'Lantern Portrait.png|100px|link=Guild Order/Jack O'Lantern (Shadow)]]<br />[[Guild Order/Jack O'Lantern (Shadow)|Jack O'Lantern<br />(Shadow)]] |
||
| − | |- |
||
| − | | [[File:NereusPortrait.png]]<br />Nereis || 400.000 || 1 || colspan="2" style="text-align:left;padding-left:5px;" | Deals medium DMG to all enemies |
||
| − | |- class="even" |
||
| − | ! colspan="5" | Stage 3 |
||
| − | |- class="even" |
||
| − | | [[File:Water GorgonPortrait.png]]<br />Frost Demogorgon|| 2.800.000 || 2 || colspan="2" style="text-align:left;padding-left:5px;" | Deals medium DMG to five random enemies |
||
| − | |- |
||
| − | ! colspan="5" | Stage 4 |
||
| − | |- |
||
| − | | [[File:Sirrush SilencePortrait.png]]<br />Sirrush Silence || 700.000 || 3 || colspan="2" style="text-align:left;padding-left:5px;" | Deals high damage to all enemies and applies {{Icon|combo_up}} Combo Rate↑ to all allies |
||
| − | |- |
||
| − | | [[File:Water GorgonPortrait.png]]<br />Gorgon Flare || 1.600.000 || 3 || colspan="2" style="text-align:left;padding-left:5px;" | Deals ~3.000 DMG to four random enemies |
||
| − | |- |
||
| − | | [[File:Water Knight BellisPortrait.png]]<br />Water Knight Bellis || 1.500.000 || 1 || colspan="2" style="text-align:left;padding-left:5px;" | Applies {{Icon|def_up}} DMG Cut (100%, 2 times) to all allies |
||
| − | |- class="even" |
||
| − | ! colspan="5" | Stage 5 |
||
| − | |- class="even" |
||
| − | | rowspan="3" | [[File:Jormungandr Small Portrait.png]]<br />Jormungandr [Shadow] |
||
| − | | rowspan="3" | 9.000.000 |
||
| − | | rowspan="3" | 2 |
||
| − | | Normal Overdrive || style="text-align:left;padding-left:5px;" | Deals medium damage to 3 enemies and applies {{Icon|def_up}} DMG Cut (100%. 3 times) to self |
||
| − | |- class="even" |
||
| − | | Raging Overdrive |
||
| − | | style="text-align:left;padding-left:5px;" | Deals high DMG to all enemies |
||
| − | |- class="even" |
||
| − | | Triggered Ability<br />(Below 50% HP and full overdrive meter) |
||
| − | | style="text-align:left;padding-left:5px;" | Deals extreme DMG to 2 enemies. |
||
|} |
|} |
||
| − | == Crom Cruach [Shadow] == |
||
| − | [[File: Crom Cruach Bounty.png|center|x200px]] |
||
| − | {| class="BandedRows" |
||
| − | ! Enemy !! HP !! Overdrive Meter !! colspan="2" | Overdrive / Abilities |
||
| − | |- class="even" |
||
| − | ! colspan="5" | Stage 1 |
||
| − | |- class="even" |
||
| − | | [[File:PeludaPortrait.png]]<br />Peluda || 550.000 || 2 || colspan="2" style="text-align:left;padding-left:5px;" | Applies {{Icon|def_up}} Reflect to all allies |
||
| − | |- class="even" |
||
| − | | [[File:GulonPortrait.png]]<br />Gulon || 600.000 || 1 || colspan="2" style="text-align:left;padding-left:5px;" | Heals 120.000 HP to all allies |
||
| − | |- class="even" |
||
| − | | [[File:AtarPortrait.png]]<br />Atar || 600.000 || 3 || colspan="2" style="text-align:left;padding-left:5px;" | Applies {{Icon|scorched}} Scorched to all enemies (10 turns) |
||
| − | |- |
||
| − | ! colspan="5" | Stage 2 |
||
| − | |- |
||
| − | | [[File:InuhooPortrait.png]]<br />Inuhoo || 400.000 || 2 || colspan="2" style="text-align:left;padding-left:5px;" | Applies {{Icon|sealed}} Chained to all enemies |
||
| − | |- |
||
| − | | [[File:ShiranuhiPortrait.png]]<br />Shiranuhi || 900.000 || 2 || colspan="2" style="text-align:left;padding-left:5px;" | Deals very high damage to one enemy |
||
| − | |- |
||
| − | | [[File:OnibiPortrait.png]]<br />Onibi || 450.000 || 1 || colspan="2" style="text-align:left;padding-left:5px;" | Applies {{Icon|dizzy}} Dizzy to two enemies |
||
| − | |- class="even" |
||
| − | ! colspan="5" | Stage 3 |
||
| − | |- class="even" |
||
| − | | [[File:GorgonPortrait.png]]<br />Corona Demogorgon|| 3.000.000 || 2 || colspan="2" style="text-align:left;padding-left:5px;" | Deals ~3.000 DMG to five random enemies |
||
| − | |- |
||
| − | ! colspan="5" | Stage 4 |
||
| − | |- |
||
| − | | [[File:Sirrush FuryPortrait.png]]<br />Sirrush Fury || 700.000 || 3 || colspan="2" style="text-align:left;padding-left:5px;" | Deals high damage to all enemies and applies {{Icon|combo_up}} Combo Rate↑ to all allies |
||
| − | |- |
||
| − | | [[File:GorgonPortrait.png]]<br />Gorgon Flare || 1.200.000 || 3 || colspan="2" style="text-align:left;padding-left:5px;" | Deals ~3.000 DMG to four random enemies |
||
| − | |- |
||
| − | | [[File:Fire Knight BellisPortrait.png]]<br />Fire Knight Bellis || 1.200.000 || 1 || colspan="2" style="text-align:left;padding-left:5px;" | Applies {{Icon|def_up}} DMG Cut (100%, 2 times) to all allies |
||
| − | |- class="even" |
||
| − | ! colspan="5" | Stage 5 |
||
| − | |- class="even" |
||
| − | | rowspan="3" | [[File:CromCruachPortrait.png|60px]]<br />Crom Cruach [Shadow] |
||
| − | | rowspan="3" | 8.500.000 |
||
| − | | rowspan="3" | 2 |
||
| − | | Normal Overdrive || style="text-align:left;padding-left:5px;" | Deals 1.000 ~ 2.000 DMG to all enemies and applies {{Icon|Scordched}} Scorched (-10%hp per turn. 3 turns) |
||
| − | |- class="even" |
||
| − | | Raging Overdrive |
||
| − | | style="text-align:left;padding-left:5px;" | Deals ~9.000 DMG to two enemies, and applies {{Icon|combo_up}} Combo Rate↑ and {{Icon|fire_up}} Fire ATK↑ to self |
||
| − | |- class="even" |
||
| − | | Triggered Ability (Upon raging) |
||
| − | | style="text-align:left;padding-left:5px;" | Deals ~9.000 DMG to all enemies |
||
| − | |} |
||
| + | {{Event Navbox}} |
||
| − | '''Note:''' damage numbers are against water characters. |
||
| − | [[Category: |
+ | [[Category:Events]] |
| + | [[Category:Guild Order]] |
||
Revision as of 15:45, 19 July 2021

Guild Receptionist
Bounty which is distributed through the Guild, will bring forth very strong enemies to be challenged through this permanent content. You have 14 days of time to defeat the enemy in the Bounty and accomplishing determinated missions you obtain points to exchange with rewards. Guild Order can be accessed from Rank 51 and above.
Mechanics
- The enemy written on the Bounty can be challenged max. 7 times in a week without use Elixirs.
- If your party is defeated the game allow to continue the battle where you have left (like in Tower Event).
- Every week there are 10 missions and for each completed you get 1 point.
- The missions will change after 7 days, but the accumulated points don't reset.
- Points accumulated can be exchanged for rewards and they will remain intact until the Guild change enemy.
- According the element enemy you can obtain 2 SSR Weapons of Auricalcum series.
Previous Mechanics
- The enemy written on the Bounty can be challenged once per day without use Elixirs.
- If your party is defeated you need wait the next day before start a new battle.
- Every week there are 10 missions and for each completed you get 1 point.
- Both rewards and missions will change after 7 days and the accumulated points is also reset.
- Points accumulated can be exchanged for rewards, but after 7 days previous rewards cannot be claimed.
- Until November 1st 2020 it was possible to obtain 800 Magic Jewels.
| Mission Points |
Reward | Mission Points |
Reward | ||
|---|---|---|---|---|---|
| 1 |  |
5 x Half Elixir | 8 | 1 x SSR Auricalcum weapon series, (see below) | |
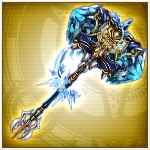
| 2 |  |
15 x Energy Seed | 10 |  |
1 x Orichalcon |
| 3 |  |
1 x Evolved Grimoire | 12 | |
2 x Evolved Grimoire |
| 4 | 1 x SSR Auricalcum weapon series, (see below) |
15 |  |
2 x Grimoire of Apotheosis | |
| 5 | |
1 x Grimoire of Apotheosis | 18 | |
1 x Orichalcon |
| 6 | |
1 x Orichalcon | 20 | |
2 x Orichalcon |
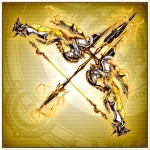
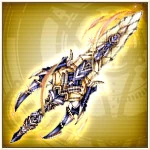
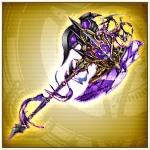
Depending on Element's enemies you get:


Bounty List
The Bounty list goes from left to right and arrived at end of Cycle 2 restart from beginning of Cycle 1.
| Cycle 1 (Multiple Enemies per wave) | |||||
|---|---|---|---|---|---|
 Crom Cruach (Shadow) |
 Jormungandr (Shadow) |
 Quetzalcoatl (Shadow) |
 Yggdrasil (Shadow) |
 Saint Nicholas (Shadow) |
 Dullahan (Shadow) |
| Cycle 2 (Miniboss Rush) | |||||
|---|---|---|---|---|---|
 Cthugha (Shadow) |
 Spirit Turtle [Reiki] (Shadow) |
 Icarus (Shadow) |
 Sandalphon (Shadow) |
 Barong (Shadow) |
 Jack O'Lantern (Shadow) |
| |||||||||||||||||