Tag: Source edit |
(Fix) Tag: Source edit |
||
| (5 intermediate revisions by the same user not shown) | |||
| Line 23: | Line 23: | ||
|- |
|- |
||
| 1 || style="width:50px;padding: 0px;" | [[File:Half Elixir.jpg|50px]] || 5 x Half Elixir |
| 1 || style="width:50px;padding: 0px;" | [[File:Half Elixir.jpg|50px]] || 5 x Half Elixir |
||
| − | | 8 || style="width:50px;padding: 0px;" | || |
+ | | 8 || style="width:50px;padding: 0px;" | || 1 x SSR Auricalcum weapon series,<br />(see below) |
| − | depend on Element of the Quests |
||
|- |
|- |
||
| 2 || style="padding: 0px;" | [[File:Energy Seed.jpg|50px]] || 15 x Energy Seed |
| 2 || style="padding: 0px;" | [[File:Energy Seed.jpg|50px]] || 15 x Energy Seed |
||
| Line 32: | Line 31: | ||
| 12 || style="padding: 0px;" | [[File:Evolved Grimoire.jpg|50px]] || 2 x Evolved Grimoire |
| 12 || style="padding: 0px;" | [[File:Evolved Grimoire.jpg|50px]] || 2 x Evolved Grimoire |
||
|- |
|- |
||
| − | | 4 || style="padding: 0px;" | || |
+ | | 4 || style="padding: 0px;" | || 1 x SSR Auricalcum weapon series,<br />(see below) |
| − | depend on Element of the Quests |
||
| 15 || style="padding: 0px;" | [[File:Grimoire of Apotheosis.jpg|50px]] || 2 x Grimoire of Apotheosis |
| 15 || style="padding: 0px;" | [[File:Grimoire of Apotheosis.jpg|50px]] || 2 x Grimoire of Apotheosis |
||
|- |
|- |
||
| Line 41: | Line 39: | ||
| 6 || style="padding: 0px;" | [[File:Orichalcon.jpg|50px]] || 1 x Orichalcon |
| 6 || style="padding: 0px;" | [[File:Orichalcon.jpg|50px]] || 1 x Orichalcon |
||
| 20 || style="padding: 0px;" | [[File:Orichalcon.jpg|50px]] || 2 x Orichalcon |
| 20 || style="padding: 0px;" | [[File:Orichalcon.jpg|50px]] || 2 x Orichalcon |
||
| + | |} |
||
| + | |||
| + | Depending on Element's enemies you get: |
||
| + | {| class="BandedRows" style="width:auto;" cellpadding="6" align="center" |
||
| + | ! Fire !! Water !! Wind !! Thunder !! Light !! Dark |
||
| + | |- |
||
| + | | [[File:Inflamation Gun Auricalcum Portrait.jpg|50px]]<br />[[Inflamation Gun Auricalcum]] |
||
| + | | [[File:Zero Freeze Hammer Auricalcum Portrait.jpg|50px]]<br />[[Zero Freeze Hammer Auricalcum]] |
||
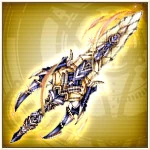
| + | | [[File:Revolutionary Arcane Auricalcum Portrait.jpg|50px]]<br />[[Revolutionary Arcane Auricalcum]] |
||
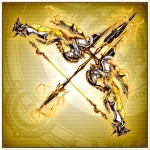
| + | | [[File:Thunderclap Bow Auricalcum Portrait.jpg|50px]]<br />[[Thunderclap Bow Auricalcum]] |
||
| + | | [[File:Brilliance Glaive Auricalcum Portrait.jpg|50px]]<br />[[Brilliance Glaive Auricalcum]] |
||
| + | | [[File:Pitch Dark Axe Auricalcum Portrait.jpg|50px]]<br />[[Pitch Dark Axe Auricalcum]] |
||
|} |
|} |
||
Revision as of 15:45, 19 July 2021

Guild Receptionist
Bounty which is distributed through the Guild, will bring forth very strong enemies to be challenged through this permanent content. You have 14 days of time to defeat the enemy in the Bounty and accomplishing determinated missions you obtain points to exchange with rewards. Guild Order can be accessed from Rank 51 and above.
Mechanics
- The enemy written on the Bounty can be challenged max. 7 times in a week without use Elixirs.
- If your party is defeated the game allow to continue the battle where you have left (like in Tower Event).
- Every week there are 10 missions and for each completed you get 1 point.
- The missions will change after 7 days, but the accumulated points don't reset.
- Points accumulated can be exchanged for rewards and they will remain intact until the Guild change enemy.
- According the element enemy you can obtain 2 SSR Weapons of Auricalcum series.
Previous Mechanics
- The enemy written on the Bounty can be challenged once per day without use Elixirs.
- If your party is defeated you need wait the next day before start a new battle.
- Every week there are 10 missions and for each completed you get 1 point.
- Both rewards and missions will change after 7 days and the accumulated points is also reset.
- Points accumulated can be exchanged for rewards, but after 7 days previous rewards cannot be claimed.
- Until November 1st 2020 it was possible to obtain 800 Magic Jewels.
| Mission Points |
Reward | Mission Points |
Reward | ||
|---|---|---|---|---|---|
| 1 |  |
5 x Half Elixir | 8 | 1 x SSR Auricalcum weapon series, (see below) | |
| 2 |  |
15 x Energy Seed | 10 |  |
1 x Orichalcon |
| 3 |  |
1 x Evolved Grimoire | 12 | |
2 x Evolved Grimoire |
| 4 | 1 x SSR Auricalcum weapon series, (see below) |
15 |  |
2 x Grimoire of Apotheosis | |
| 5 | |
1 x Grimoire of Apotheosis | 18 | |
1 x Orichalcon |
| 6 | |
1 x Orichalcon | 20 | |
2 x Orichalcon |
Depending on Element's enemies you get:


Bounty List
The Bounty list goes from left to right and arrived at end of Cycle 2 restart from beginning of Cycle 1.
| Cycle 1 (Multiple Enemies per wave) | |||||
|---|---|---|---|---|---|
 Crom Cruach (Shadow) |
 Jormungandr (Shadow) |
 Quetzalcoatl (Shadow) |
 Yggdrasil (Shadow) |
 Saint Nicholas (Shadow) |
 Dullahan (Shadow) |
| Cycle 2 (Miniboss Rush) | |||||
|---|---|---|---|---|---|
 Cthugha (Shadow) |
 Spirit Turtle [Reiki] (Shadow) |
 Icarus (Shadow) |
 Sandalphon (Shadow) |
 Barong (Shadow) |
 Jack O'Lantern (Shadow) |
| |||||||||||||||||