m (Reverted edits by 108.28.8.120 (talk) to last version by Xkpaulo) |
m (Reverted edits by 2405:204:D081:49BA:9438:81DA:4A10:EECC (talk) to last version by Xkpaulo) |
||
| (7 intermediate revisions by 3 users not shown) | |||
| Line 4: | Line 4: | ||
== Acquiring Kamihime == |
== Acquiring Kamihime == |
||
| − | There are three ways at present of obtain new Kamihime. [[Gacha]], clearing Episodes in the Main Quest and doing Raid Events. When a weapon associated with the Kamihime is acquired via the Gacha for the first time, the Kamihime will join the player's party. Unlike weapons and [[Eidolons]], there is no limit to the number of Kamihime one may hold at any time. |
+ | There are three ways at present of obtain new Kamihime. [[Gacha]], clearing Episodes in the Main Quest and doing Raid Events. When a [[Weapons|weapon]] associated with the Kamihime is acquired via the Gacha for the first time, the Kamihime will join the player's party. Unlike weapons and [[Eidolons]], there is no limit to the number of Kamihime one may hold at any time. |
<!-- ### MAIN QUEST ### --> |
<!-- ### MAIN QUEST ### --> |
||
{| class="infobox mw-collapsible mw-collapsed" style="border:0px;" |
{| class="infobox mw-collapsible mw-collapsed" style="border:0px;" |
||
| Line 97: | Line 97: | ||
| |
| |
||
<gallery widths="90px" hideaddbutton="true" position="center" spacing="small" captionalign="center" columns="5" navigation="true"> |
<gallery widths="90px" hideaddbutton="true" position="center" spacing="small" captionalign="center" columns="5" navigation="true"> |
||
| + | (Paradise Wind) Yamaraja Portrait.png|link=(Paradise Wind) Yamaraja|[[(Paradise Wind) Yamaraja]] |
||
(Snow White Princess) Amaterasu Portrait.png|link=(Snow White Princess) Amaterasu|[[(Snow White Princess) Amaterasu]] |
(Snow White Princess) Amaterasu Portrait.png|link=(Snow White Princess) Amaterasu|[[(Snow White Princess) Amaterasu]] |
||
Atalanta Portrait.png|link=Atalanta|[[Atalanta]] |
Atalanta Portrait.png|link=Atalanta|[[Atalanta]] |
||
Attar Portrait.png|link=Attar|[[Attar]] |
Attar Portrait.png|link=Attar|[[Attar]] |
||
Baldr Portrait.png|link=Baldr|[[Baldr]] |
Baldr Portrait.png|link=Baldr|[[Baldr]] |
||
| ⚫ | |||
| ⚫ | |||
Ceridwen Portrait.png|link=Ceridwen|[[Ceridwen]] |
Ceridwen Portrait.png|link=Ceridwen|[[Ceridwen]] |
||
Cupid Portrait.png|link=Cupid|[[Cupid]] |
Cupid Portrait.png|link=Cupid|[[Cupid]] |
||
Fortuna Portrait.png|link=Fortuna|[[Fortuna]] |
Fortuna Portrait.png|link=Fortuna|[[Fortuna]] |
||
Gabriel Portrait.png|link=Gabriel|[[Gabriel]] |
Gabriel Portrait.png|link=Gabriel|[[Gabriel]] |
||
| ⚫ | |||
| ⚫ | |||
Heimdallr Portrait.png|link=Heimdallr|[[Heimdallr]] |
Heimdallr Portrait.png|link=Heimdallr|[[Heimdallr]] |
||
Kishar Portrait.png|link=Kishar|[[Kishar]] |
Kishar Portrait.png|link=Kishar|[[Kishar]] |
||
Krampus Portrait.png|link=Krampus|[[Krampus]] |
Krampus Portrait.png|link=Krampus|[[Krampus]] |
||
Manes Portrait.png|link=Manes|[[Manes]] |
Manes Portrait.png|link=Manes|[[Manes]] |
||
| ⚫ | |||
| ⚫ | |||
Rangda Portrait.png|link=Rangda|[[Rangda]] |
Rangda Portrait.png|link=Rangda|[[Rangda]] |
||
Pale Rider Portrait.png|link=Pale Rider|[[Pale Rider]] |
Pale Rider Portrait.png|link=Pale Rider|[[Pale Rider]] |
||
Phoibe Portrait.png|link=Phoibe|[[Phoibe]] |
Phoibe Portrait.png|link=Phoibe|[[Phoibe]] |
||
Principality Portrait.png|link=Principality|[[Principality]] |
Principality Portrait.png|link=Principality|[[Principality]] |
||
| ⚫ | |||
| ⚫ | |||
Tezcatlipoca Portrait.png|link=Tezcatlipoca|[[Tezcatlipoca]] |
Tezcatlipoca Portrait.png|link=Tezcatlipoca|[[Tezcatlipoca]] |
||
Themis Portrait.png|link=Themis|[[Themis]] |
Themis Portrait.png|link=Themis|[[Themis]] |
||
| Line 173: | Line 174: | ||
| '''Yukata Costumes'''<br />20th August 2018 - 30th September 2018 |
| '''Yukata Costumes'''<br />20th August 2018 - 30th September 2018 |
||
|<gallery widths="90px" hideaddbutton="true" position="left" spacing="small" captionalign="center" columns="5" navigation="true"> |
|<gallery widths="90px" hideaddbutton="true" position="left" spacing="small" captionalign="center" columns="5" navigation="true"> |
||
| − | (Crimson Thunder) Ryu-Oh Portrait.png|link=Crimson Thunder) Ryu-Oh|[[(Crimson Thunder) Ryu-Oh]] |
+ | (Crimson Thunder) Ryu-Oh Portrait.png|link=(Crimson Thunder) Ryu-Oh|[[(Crimson Thunder) Ryu-Oh]] |
(Sweet Refreshment) Freja Portrait.png|link=(Sweet Refreshment) Freja|[[(Sweet Refreshment) Freja]] |
(Sweet Refreshment) Freja Portrait.png|link=(Sweet Refreshment) Freja|[[(Sweet Refreshment) Freja]] |
||
| − | (Late Summer Breeze) Apep Portrait.png|link=Late Summer Breeze) Apep|[[(Late Summer Breeze) Apep]] |
+ | (Late Summer Breeze) Apep Portrait.png|link=(Late Summer Breeze) Apep|[[(Late Summer Breeze) Apep]] |
</gallery> |
</gallery> |
||
|- |
|- |
||
| Line 318: | Line 319: | ||
|} |
|} |
||
| − | == |
+ | == Levelling == |
| ⚫ | |||
| − | === Level === |
||
| ⚫ | |||
| + | [[Quests#Daily_Quests|Cave of Gold Ore]], better known as '''Experience Cave''', is the best place to farm experience and rank points. It can be done twice a day from Monday to Saturday and is limitless on Sunday. It provides around 5.000 exp per run for the cost of 25 AP. |
||
| ⚫ | |||
| + | |||
| ⚫ | Two types of materials are available that can be used to enhance a Kamihime, '''weapons''' and '''Arcanum'''. Similar, to enhancing Eidolons, weapons of the same element of the Kamihime will grant an extra +50% EXP, but since the player will normally obtain more EXP than is required and will have multiple Kamihime stuck at their level caps using weapons to upgrade them is '''not''' recommended unless transferring their bonus bonuses. |
||
| + | |||
| + | Arcanum are a special items available only from Premium Gacha or the Shop. '''Arcanum of Life''' costs 100 Magic Jewels or Star coins and grants 30.000 EXP to one Kamihime. '''Arcanum of Universe''' costs 1 Draconic Eye and grants 300.000 EXP. |
||
The level limits of the various rarities are as follows: |
The level limits of the various rarities are as follows: |
||
| Line 340: | Line 344: | ||
Note that Kamihime involved in the Main Story may have a number of additional Harem Scenes under the Main Story. That number is applicable only to the specific Story Kamihime. |
Note that Kamihime involved in the Main Story may have a number of additional Harem Scenes under the Main Story. That number is applicable only to the specific Story Kamihime. |
||
| − | + | == Awakening == |
|
| − | Awakening a Kamihime unleashes their full potential by increasing their base stats, maximum stats, burst attack and improving their abilities. In order to awaken a Kamihime she needs to be level 80 and all of her episodes must be cleared. This process |
+ | Awakening a Kamihime unleashes their full potential by increasing their base stats, maximum stats, burst attack and improving their abilities. In order to awaken a Kamihime she needs to be level 80 and all of her episodes must be cleared. This process requires '''three Draconic Eyes'''. Once awakened, she will revert to level 1 and gain new episodes. |
| − | |||
| − | Currently, only a few Kamihime can be awaken. The list can be found [[Kamihime#List|here]]. |
||
| − | + | == Limit Break == |
|
| − | Limit Break is the process of increasing the level cap of your Kamihime. The number of breaks and the requirements for breaking the limit depends on the Rarity of your Kamihime: Rare |
+ | Limit Break is the process of increasing the level cap of your Kamihime. The number of breaks and the requirements for breaking the limit depends on the Rarity of your Kamihime: Rare Kamihime can have their limit broken up to 3 times, while SR, SSR and Awakened Kamihime can have their limit broken up to 4 times. The number of golden stars on a Kamihime's icon indicates the number of limit breaks done for that Kamihime. |
| − | === |
+ | === Materials === |
In general, Kamihime require a mix of the following materials to have their limit broken: |
In general, Kamihime require a mix of the following materials to have their limit broken: |
||
{| class="BandedRows" style="width:100%;" |
{| class="BandedRows" style="width:100%;" |
||
| Line 414: | Line 416: | ||
|} |
|} |
||
| − | === |
+ | === Requirements === |
The requirements for Limit Breaking are based on the current limit break level of the Kamihime. |
The requirements for Limit Breaking are based on the current limit break level of the Kamihime. |
||
| Line 454: | Line 456: | ||
|- class="even" |
|- class="even" |
||
| − | | '''Total''' |
+ | | rowspan="2" | '''Total''' |
| ⚫ | |||
| style="vertical-align: text-top;" | [[File:Sacred Stone Shard.jpg|50px]]<br />2x Sacred Stone Shard |
| style="vertical-align: text-top;" | [[File:Sacred Stone Shard.jpg|50px]]<br />2x Sacred Stone Shard |
||
| − | | style="vertical-align: text-top;" | [[File: |
+ | | style="vertical-align: text-top;" | [[File:Holy Jewel of Light.jpg|50px]]<br />2x Holy Jewel of Light |
| ⚫ | |||
| style="vertical-align: text-top;" | [[File:Lithograph of Fire.jpg|50px]]<br />5x Lithographs |
| style="vertical-align: text-top;" | [[File:Lithograph of Fire.jpg|50px]]<br />5x Lithographs |
||
| − | | style="vertical-align: text-top;" | [[File: |
+ | | style="vertical-align: text-top;" | [[File:Lithograph of Scorching Heat.jpg|50px]]<br />2x Lithographs |
| − | | 1.400 |
+ | | rowspan="2" |1.400 |
| + | |- class="even" |
||
| ⚫ | |||
| ⚫ | |||
| + | | |
||
| + | | |
||
| + | | |
||
|} |
|} |
||
| Line 474: | Line 482: | ||
| style="width:15%;vertical-align: text-top;" | [[File:Dragon Bone of Fire.jpg|50px]]<br />1x Dragon Bone |
| style="width:15%;vertical-align: text-top;" | [[File:Dragon Bone of Fire.jpg|50px]]<br />1x Dragon Bone |
||
| style="width:15%;vertical-align: text-top;" | [[File:Lithograph of Fire.jpg|50px]]<br />2x Lithographs |
| style="width:15%;vertical-align: text-top;" | [[File:Lithograph of Fire.jpg|50px]]<br />2x Lithographs |
||
| − | | style=" |
+ | | style="vertical-align: text-top;" | [[File:Lithograph of Scorching Heat.jpg|50px]]<br />1x Lithographs |
| style="width:15%;" | |
| style="width:15%;" | |
||
| 500 |
| 500 |
||
| Line 482: | Line 490: | ||
| style="vertical-align: text-top;" | [[File:Holy Jewel of Light.jpg|50px]]<br />2x Holy Jewel of Light |
| style="vertical-align: text-top;" | [[File:Holy Jewel of Light.jpg|50px]]<br />2x Holy Jewel of Light |
||
| style="vertical-align: text-top;" | [[File:Holy Crystal of Light.jpg|50px]]<br />1x Holy Crystal of Light |
| style="vertical-align: text-top;" | [[File:Holy Crystal of Light.jpg|50px]]<br />1x Holy Crystal of Light |
||
| − | | style="vertical-align: text-top;" | [[File:Dragon Bone of Heliolatry.jpg|50px]]<br /> |
+ | | style="vertical-align: text-top;" | [[File:Dragon Bone of Heliolatry.jpg|50px]]<br />1x Dragon Bone |
| style="vertical-align: text-top;" | [[File:Lithograph of Scorching Heat.jpg|50px]]<br />2x Lithographs |
| style="vertical-align: text-top;" | [[File:Lithograph of Scorching Heat.jpg|50px]]<br />2x Lithographs |
||
| style="vertical-align: text-top;" | [[File:Flame Rune.jpg|50px]]<br />1x Runes |
| style="vertical-align: text-top;" | [[File:Flame Rune.jpg|50px]]<br />1x Runes |
||
| Line 507: | Line 515: | ||
|- class="even" |
|- class="even" |
||
| rowspan="3" | '''Total''' |
| rowspan="3" | '''Total''' |
||
| ⚫ | |||
| ⚫ | |||
| ⚫ | |||
| style="vertical-align: text-top;" | [[File:Sacred Stone Shard.jpg|50px]]<br />1x Sacred Stone Shard |
| style="vertical-align: text-top;" | [[File:Sacred Stone Shard.jpg|50px]]<br />1x Sacred Stone Shard |
||
| − | | style="vertical-align: text-top;" | [[File: |
+ | | style="vertical-align: text-top;" | [[File:Holy Jewel of Light.jpg|50px]]<br />2x Holy Jewel of Light |
| ⚫ | |||
| ⚫ | |||
| ⚫ | |||
| rowspan="3" | 27.000 |
| rowspan="3" | 27.000 |
||
|- class="even" |
|- class="even" |
||
| − | | style="vertical-align: text-top;" | [[File: |
+ | | style="vertical-align: text-top;" | [[File:Dragon Bone of Heliolatry.jpg|50px]]<br />3x Dragon Bone |
| − | | style="vertical-align: text-top;" | [[File: |
+ | | style="vertical-align: text-top;" | [[File:Corona Fang.jpg|50px]]<br />1x Fangs |
| style="vertical-align: text-top;" | [[File:Lithograph of Fire.jpg|50px]]<br />2x Lithographs |
| style="vertical-align: text-top;" | [[File:Lithograph of Fire.jpg|50px]]<br />2x Lithographs |
||
| − | | style="vertical-align: text-top;" | [[File: |
+ | | style="vertical-align: text-top;" | [[File:Lithograph of Scorching Heat.jpg|50px]]<br />3x Lithographs |
| − | | style=" |
+ | | style="vertical-align: text-top;" | [[File:Flame Rune.jpg|50px]]<br />3x Runes |
| − | |-class="even" |
+ | |- class="even" |
| style="vertical-align: text-top;" | [[File:Blazing_Idea_Core.jpg|50px]]<br />3x Idea Cores |
| style="vertical-align: text-top;" | [[File:Blazing_Idea_Core.jpg|50px]]<br />3x Idea Cores |
||
| style="vertical-align: text-top;" | [[File:Prison of Fire, Idea Core.jpg|50px]]<br />3x Idea Cores |
| style="vertical-align: text-top;" | [[File:Prison of Fire, Idea Core.jpg|50px]]<br />3x Idea Cores |
||
| ⚫ | |||
| ⚫ | |||
| |
| |
||
| |
| |
||
| Line 534: | Line 542: | ||
|- |
|- |
||
| ★ ☆ ☆ ☆ |
| ★ ☆ ☆ ☆ |
||
| ⚫ | |||
| style="width:15%;vertical-align: text-top;" | [[File:Holy Crystal of Light.jpg|50px]]<br />1x Holy Crystal of Light |
| style="width:15%;vertical-align: text-top;" | [[File:Holy Crystal of Light.jpg|50px]]<br />1x Holy Crystal of Light |
||
| ⚫ | |||
| style="width:15%;vertical-align: text-top;" | [[File:Lithograph of Scorching Heat.jpg|50px]]<br />2x Lithographs |
| style="width:15%;vertical-align: text-top;" | [[File:Lithograph of Scorching Heat.jpg|50px]]<br />2x Lithographs |
||
| style="width:15%;" | |
| style="width:15%;" | |
||
| Line 543: | Line 551: | ||
|- |
|- |
||
| ★ ★ ☆ ☆ |
| ★ ★ ☆ ☆ |
||
| ⚫ | |||
| ⚫ | |||
| style="vertical-align: text-top;" | [[File:Holy Crystal of Light.jpg|50px]]<br />3x Holy Crystal of Light |
| style="vertical-align: text-top;" | [[File:Holy Crystal of Light.jpg|50px]]<br />3x Holy Crystal of Light |
||
| style="vertical-align: text-top;" | [[File:Dragon Bone of Heliolatry.jpg|50px]]<br />1x Dragon Bone |
| style="vertical-align: text-top;" | [[File:Dragon Bone of Heliolatry.jpg|50px]]<br />1x Dragon Bone |
||
| ⚫ | |||
| style="vertical-align: text-top;" | [[File:Flame Rune.jpg|50px]]<br />1x Runes |
| style="vertical-align: text-top;" | [[File:Flame Rune.jpg|50px]]<br />1x Runes |
||
| ⚫ | |||
| 2.000 |
| 2.000 |
||
|- |
|- |
||
| ★ ★ ★ ☆ |
| ★ ★ ★ ☆ |
||
| ⚫ | |||
| ⚫ | |||
| style="vertical-align: text-top;" | [[File:Holy_Star_of_Light.jpg|50px]]<br />3x Holy Star of Light |
| style="vertical-align: text-top;" | [[File:Holy_Star_of_Light.jpg|50px]]<br />3x Holy Star of Light |
||
| style="vertical-align: text-top;" | [[File:Dragon Bone of Heliolatry.jpg|50px]]<br />2x Dragon Bone |
| style="vertical-align: text-top;" | [[File:Dragon Bone of Heliolatry.jpg|50px]]<br />2x Dragon Bone |
||
| ⚫ | |||
| style="vertical-align: text-top;" | [[File:Flame Rune.jpg|50px]]<br />3x Runes |
| style="vertical-align: text-top;" | [[File:Flame Rune.jpg|50px]]<br />3x Runes |
||
| ⚫ | |||
| 4.000 |
| 4.000 |
||
| Line 570: | Line 578: | ||
|- class="even" |
|- class="even" |
||
| rowspan="2" | '''Total''' |
| rowspan="2" | '''Total''' |
||
| ⚫ | |||
| + | | style="vertical-align: text-top;" | [[File:Holy_Star_of_Light.jpg|50px]]<br />3x Holy Star of Light |
||
| ⚫ | |||
| style="vertical-align: text-top;" | [[File:Corona Fang.jpg|50px]]<br />3x Fangs |
| style="vertical-align: text-top;" | [[File:Corona Fang.jpg|50px]]<br />3x Fangs |
||
| ⚫ | |||
| ⚫ | |||
| ⚫ | |||
| style="vertical-align: text-top;" | [[File:Lithograph of Scorching Heat.jpg|50px]]<br />2x Lithographs |
| style="vertical-align: text-top;" | [[File:Lithograph of Scorching Heat.jpg|50px]]<br />2x Lithographs |
||
| rowspan="2" | 27.000 |
| rowspan="2" | 27.000 |
||
| − | |||
|- class="even" |
|- class="even" |
||
| style="vertical-align: text-top;" | [[File:Flame Rune.jpg|50px]]<br />4x Runes |
| style="vertical-align: text-top;" | [[File:Flame Rune.jpg|50px]]<br />4x Runes |
||
| − | | style="vertical-align: text-top;" | [[File: |
+ | | style="vertical-align: text-top;" | [[File:Blazing_Idea_Core.jpg|50px]]<br />5x Idea Cores |
| − | | style="vertical-align: text-top;" | [[File: |
+ | | style="vertical-align: text-top;" | [[File:Prison of Fire, Idea Core.jpg|50px]]<br />8x Idea Cores |
| style="vertical-align: text-top;" | [[File:Grimoire of Apotheosis.jpg|50px]]<br />5x Grimoire of Apotheosis |
| style="vertical-align: text-top;" | [[File:Grimoire of Apotheosis.jpg|50px]]<br />5x Grimoire of Apotheosis |
||
| |
| |
||
| Line 592: | Line 599: | ||
|- |
|- |
||
| ★ ☆ ☆ ☆ |
| ★ ☆ ☆ ☆ |
||
| ⚫ | |||
| ⚫ | |||
| style="width:15%;vertical-align: text-top;" | [[File:Holy Crystal of Light.jpg|50px]]<br />2x Holy Crystal of Light |
| style="width:15%;vertical-align: text-top;" | [[File:Holy Crystal of Light.jpg|50px]]<br />2x Holy Crystal of Light |
||
| ⚫ | |||
| ⚫ | |||
| style="width:15%;vertical-align: text-top;" | [[File:Lithograph of Scorching Heat.jpg|50px]]<br />3x Lithographs |
| style="width:15%;vertical-align: text-top;" | [[File:Lithograph of Scorching Heat.jpg|50px]]<br />3x Lithographs |
||
| style="width:15%;" | |
| style="width:15%;" | |
||
| Line 601: | Line 608: | ||
|- |
|- |
||
| ★ ★ ☆ ☆ |
| ★ ★ ☆ ☆ |
||
| ⚫ | |||
| ⚫ | |||
| style="vertical-align: text-top;" | [[File:Holy Crystal of Light.jpg|50px]]<br />5x Holy Crystal of Light |
| style="vertical-align: text-top;" | [[File:Holy Crystal of Light.jpg|50px]]<br />5x Holy Crystal of Light |
||
| style="vertical-align: text-top;" | [[File:Dragon Bone of Heliolatry.jpg|50px]]<br />4x Dragon Bone |
| style="vertical-align: text-top;" | [[File:Dragon Bone of Heliolatry.jpg|50px]]<br />4x Dragon Bone |
||
| ⚫ | |||
| style="vertical-align: text-top;" | [[File:Flame Rune.jpg|50px]]<br />3x Runes |
| style="vertical-align: text-top;" | [[File:Flame Rune.jpg|50px]]<br />3x Runes |
||
| ⚫ | |||
| 20.000 |
| 20.000 |
||
|- |
|- |
||
| ★ ★ ★ ☆ |
| ★ ★ ★ ☆ |
||
| ⚫ | |||
| − | | style="vertical-align: text-top;" | [[File:Prison of Fire, Idea Core.jpg|50px]]<br />5x Idea Cores |
||
| style="vertical-align: text-top;" | [[File:Holy_Star_of_Light.jpg|50px]]<br />5x Holy Star of Light |
| style="vertical-align: text-top;" | [[File:Holy_Star_of_Light.jpg|50px]]<br />5x Holy Star of Light |
||
| ⚫ | |||
| style="vertical-align: text-top;" | [[File:Flame Rune.jpg|50px]]<br />5x Runes |
| style="vertical-align: text-top;" | [[File:Flame Rune.jpg|50px]]<br />5x Runes |
||
| ⚫ | |||
| style="vertical-align: text-top;" | [[File:Evolved Grimoire.jpg|50px]]<br />1x Evolved Grimoire |
| style="vertical-align: text-top;" | [[File:Evolved Grimoire.jpg|50px]]<br />1x Evolved Grimoire |
||
| 40.000 |
| 40.000 |
||
| Line 628: | Line 635: | ||
|- class="even" |
|- class="even" |
||
| rowspan="2" | '''Total''' |
| rowspan="2" | '''Total''' |
||
| ⚫ | |||
| ⚫ | |||
| ⚫ | |||
| style="vertical-align: text-top;" | [[File:Corona Fang.jpg|50px]]<br />7x Fangs |
| style="vertical-align: text-top;" | [[File:Corona Fang.jpg|50px]]<br />7x Fangs |
||
| ⚫ | |||
| − | | style="vertical-align: text-top;" | [[File:Prison of Fire, Idea Core.jpg|50px]]<br />10x Idea Cores |
||
| ⚫ | |||
| style="vertical-align: text-top;" | [[File:Lithograph of Scorching Heat.jpg|50px]]<br />3x Lithographs |
| style="vertical-align: text-top;" | [[File:Lithograph of Scorching Heat.jpg|50px]]<br />3x Lithographs |
||
| rowspan="2" | 270.000 |
| rowspan="2" | 270.000 |
||
| − | |||
|- class="even" |
|- class="even" |
||
| style="vertical-align: text-top;" | [[File:Flame Rune.jpg|50px]]<br />8x Runes |
| style="vertical-align: text-top;" | [[File:Flame Rune.jpg|50px]]<br />8x Runes |
||
| − | | style="vertical-align: text-top;" | [[File: |
+ | | style="vertical-align: text-top;" | [[File:Blazing_Idea_Core.jpg|50px]]<br />5x Idea Cores |
| − | | style="vertical-align: text-top;" | [[File: |
+ | | style="vertical-align: text-top;" | [[File:Prison of Fire, Idea Core.jpg|50px]]<br />10x Idea Cores |
| style="vertical-align: text-top;" | [[File:Evolved Grimoire.jpg|50px]]<br />3x Evolved Grimoire |
| style="vertical-align: text-top;" | [[File:Evolved Grimoire.jpg|50px]]<br />3x Evolved Grimoire |
||
| style="vertical-align: text-top;" | [[File:Grimoire of Apotheosis.jpg|50px]]<br />6x Grimoire of Apotheosis |
| style="vertical-align: text-top;" | [[File:Grimoire of Apotheosis.jpg|50px]]<br />6x Grimoire of Apotheosis |
||
| Line 644: | Line 650: | ||
|- class="even" |
|- class="even" |
||
| rowspan="2" | '''Total<br />(Including SSR)''' |
| rowspan="2" | '''Total<br />(Including SSR)''' |
||
| ⚫ | |||
| ⚫ | |||
| + | | style="vertical-align: text-top;" | [[File:Dragon Bone of Heliolatry.jpg|50px]]<br />14x Dragon Bone |
||
| style="vertical-align: text-top;" | [[File:Corona Fang.jpg|50px]]<br />10x Fangs |
| style="vertical-align: text-top;" | [[File:Corona Fang.jpg|50px]]<br />10x Fangs |
||
| ⚫ | |||
| ⚫ | |||
| ⚫ | |||
| style="vertical-align: text-top;" | [[File:Lithograph of Scorching Heat.jpg|50px]]<br />5x Lithographs |
| style="vertical-align: text-top;" | [[File:Lithograph of Scorching Heat.jpg|50px]]<br />5x Lithographs |
||
| rowspan="2" | 297.000 |
| rowspan="2" | 297.000 |
||
| − | |||
|- class="even" |
|- class="even" |
||
| style="vertical-align: text-top;" | [[File:Flame Rune.jpg|50px]]<br />12x Runes |
| style="vertical-align: text-top;" | [[File:Flame Rune.jpg|50px]]<br />12x Runes |
||
| − | | style="vertical-align: text-top;" | [[File: |
+ | | style="vertical-align: text-top;" | [[File:Blazing_Idea_Core.jpg|50px]]<br />10x Idea Cores |
| − | | style="vertical-align: text-top;" | [[File: |
+ | | style="vertical-align: text-top;" | [[File:Prison of Fire, Idea Core.jpg|50px]]<br />18x Idea Cores |
| style="vertical-align: text-top;" | [[File:Evolved Grimoire.jpg|50px]]<br />3x Evolved Grimoire |
| style="vertical-align: text-top;" | [[File:Evolved Grimoire.jpg|50px]]<br />3x Evolved Grimoire |
||
| style="vertical-align: text-top;" | [[File:Grimoire of Apotheosis.jpg|50px]]<br />11x Grimoire of Apotheosis |
| style="vertical-align: text-top;" | [[File:Grimoire of Apotheosis.jpg|50px]]<br />11x Grimoire of Apotheosis |
||
| Line 665: | Line 670: | ||
To change the table layout visit: http://kamihime-project.wikia.com/wiki/Module:Kamihime_DisplayTable |
To change the table layout visit: http://kamihime-project.wikia.com/wiki/Module:Kamihime_DisplayTable |
||
--> |
--> |
||
| − | {{:Kamihime/List}} |
+ | {{:Kamihime/List}} |
| + | [[Category:Kamihime]] |
||
Revision as of 17:21, 4 June 2019

Nike - a caring and gentle Kamihime.
Kamihime are former humans that were able to obtain god-like powers. They possess strong magic and incredible prowess. Most of them lost their memories after Ragnarok and are now trying to prevent a second one.
Acquiring Kamihime
There are three ways at present of obtain new Kamihime. Gacha, clearing Episodes in the Main Quest and doing Raid Events. When a weapon associated with the Kamihime is acquired via the Gacha for the first time, the Kamihime will join the player's party. Unlike weapons and Eidolons, there is no limit to the number of Kamihime one may hold at any time.
| Main Quest |
|---|
| These Kamihime can be unlocked by playing the main story. Unlike most Kamihime, they don't have a release weapon. |
")
")
")
")
| Gem Gacha | |
|---|---|
| The following list show the Kamihime available on Gem Gacha. | |
Fire |
|
Water |
|
Wind |
|
Thunder |
|
Light |
|
Dark |
|
")
")
")
")
")
")
")
")
")
")
")
")
")
")
")
")
")
")
")
")
")
")
")
")
")
")
")
")
")
")
")
")
")
")
")
")
")
| Events | |
|---|---|
| Raid Events | |
| Advent Events | |
| Login bonus, promotions, etc. | |
 Yamaraja (88 KB)")
 Amaterasu (62 KB)")
")
")
")
")
")
")
")
")
")
")
")
")
")
")
")
")
")
")
")
")
")
")
 (39 KB)")
 (38 KB)")
")
")
")
 (39 KB)")
")
| Limited | |
|---|---|
| Available for a limited time in Magic Jewel Gacha and/or Premium Gacha. | |
| Summer Costumes, 2017 3rd July 2017 - 28th August 2017 14th June 2018 ~ 12th July 2018 |
|
| Summer Costumes 2018 1 July 2017 - 1st August 2018 |
|
| Summer Night Breeze, 2018 2nd August 2018 - 2nd September 2018 |
|
| Yukata Costumes 20th August 2018 - 30th September 2018 |
|
| Halloween Costumes, 2017 25th October 2017 - 11th November 2017 16th October 2018 - 21th October 2018 6th November 2018 - 11th November 2018 |
|
| Halloween Costumes, 2018 21st October 2018 - 2nd December 2018 |
|
| Christmas Costumes, 2017 30th November 2017 - 10th January 2018 2nd December 2018 - 25th December 2018 |
|
| Christmas Costumes, 2018 1st December 2018 - 10th January 2018 |
|
| New Year, 2018 1st January 2018 - 1st February 2018 3rd January 2019 - 31st January 2019 |
|
| New Year, 2019 #1 25th December 2018 - 31st January 2019 |
|
| New Year, 2019 #2 1st January 2019 - 31st January 2019 |
|
| Valentine, 2019 1st February 2019 - 28th February 2019 |
|
| Koihime † Musou Crossover 21st November 2017 - 10th December 2017 9th October 2018 - 11th November 2018 |
|
| Koihime † Musou Crossover Part 2 20th November 2018 - 25th December 2018 |
|
| Princess Knights Story 20th August 2018 - 20th September 2018 |
|
 Nergal (135 KB)")
 Sol (136 KB)")
 Brynhildr (131 KB)")
 Poseidon (138 KB)")
 Boreas (134 KB)")
 Ignis (138 KB)")
 Metatron (53 KB)")
 Gabriel (133 KB)")
 Zeruel (134 KB)")
 Ryu-Oh (37 KB)")
 Freja (45 KB)")
 Apep (52 KB)")
 Artemis (66 KB)")
 Michael (70 KB)")
 Osiris (47 KB)")
 Kingu (50 KB)")
 Neith (45 KB)")
 Satan (71 KB)")
 Perun (83 KB)")
 Hermod (71 KB)")
 Nephthys (53 KB)")
 Nyarlathotep (51 KB)")
 Kamadeva (49 KB)")
 Amaterasu (50 KB)")
 Aphrodite (60 KB)")
 Nike (52 KB)")
 Konohana-Sakuya (43 KB)")
 Kushinada (53 KB)")
 Bastet (54 KB)")
 Uzume (48 KB)")
 Dike (41 KB)")
 (68 KB)")
 (66 KB)")
 (39 KB)")
 (43 KB)")
")
")
Types
Kamihime can have one of five available types:
 - Offense Kamihime have the highest damage output. Usually they're capable of buffing their own damage or lowering enemies' defenses. They have high ATK but low HP.
- - With abilities to help mitigate damage, these Kamihime have higher survivability at the cost of lower damage. They have high HP and low ATK.
- - They're a mix between Offense and Defense. Their kit has both offensive and defensive abilities.
- - Healers have abilities that restore HP to allies and/or cure afflictions. Overall, they can increase the party survivability but, unlike Defense Kamihime, are incapable of preventing burst damage (e.g: enemy Overdrive).
- - They can help control the fight either by debuffing enemies, applying negative statuses to enemies or by buffing allies.
Abilities
Kamihime gain abilities when certain conditions are met, as detailed in the table below. Some are entirely new skills not available before and some are upgrades to either their basic, or obtained skills. New skills are acquired after viewing scenes in the Harem system. Harem episodes are unlocked at the levels stated below. Ability upgrades are automatically applied when the Kamihime reaches the level threshold.
Abilities are divided into three categories: Burst Abilities, Active Abilities and Assist Abilities (Passives).
- Burst Abilities are activated whenever a Kamihime uses a Burst Attack once her Mode Gauge is at 100.
- Active Abilities can be activated at will by the player between attack turns and cost zero turns to activate, but remain in cooldown before they can be used again.
- Assist Abilities are always active as long as the Kamihime is in the active Party and their effects apply to themselves only.
| Rarity | Requirement | Effect |
|---|---|---|
| Basic | Moderate Burst, one Active Ability | |
| Level 25 (★ ☆ ☆) | Second Active Ability available through Harem | |
| ★ ★ ☆ (current level irrelevant) | Burst damage increased | |
| Level 45 (★★★) | First Active Ability improved | |
| Basic | High Burst, two Active Abilities, one Assist Ability | |
| Level 35 (★ ☆ ☆ ☆) | Third Active Ability available through Harem | |
| Level 45 (★ ★ ☆ ☆) | First Active Ability improved | |
| ★ ★ ★ ☆ (current level irrelevant) | Burst damage increased | |
| Level 55 (★ ★ ★ ☆) | Second Harem episode available, rewarding Magic Jewels | |
| Level 65 (★ ★ ★ ★) | Second Active Ability improved. | |
| Basic | Extreme Burst, two Active Abilities, one Assist Ability | |
| Level 45 (★ ☆ ☆ ☆) | Third Active Ability available through Harem | |
| Level 55 (★ ★ ☆ ☆) | First Active Ability improved | |
| ★ ★ ★ ☆ (current level irrelevant) | Burst damage increased | |
| Level 65 (★ ★ ★ ☆) | Second Harem episode available, rewarding Magic Jewels | |
| Level 75 (★ ★ ★ ★) | Second Active Ability improved | |
| Basic | Maximum Burst, three Active Abilities, one Assist Ability | |
| Level 45 (★ ☆ ☆ ☆) | Third Active Ability improved. | |
| Level 55 (★ ★ ☆ ☆) | Assist Ability improved | |
| Level 65 (★ ★ ★ ☆) | First Active Ability improved | |
| Level 75 (★ ★ ★ ★) | Second Active Ability improved. |
Levelling
Kamihime can be enhanced in two ways - using them in battle will allocate EXP to them if they are in the active team and enhancing them with materials will allocate EXP to them outside of battle.
Cave of Gold Ore, better known as Experience Cave, is the best place to farm experience and rank points. It can be done twice a day from Monday to Saturday and is limitless on Sunday. It provides around 5.000 exp per run for the cost of 25 AP.
Two types of materials are available that can be used to enhance a Kamihime, weapons and Arcanum. Similar, to enhancing Eidolons, weapons of the same element of the Kamihime will grant an extra +50% EXP, but since the player will normally obtain more EXP than is required and will have multiple Kamihime stuck at their level caps using weapons to upgrade them is not recommended unless transferring their bonus bonuses.
Arcanum are a special items available only from Premium Gacha or the Shop. Arcanum of Life costs 100 Magic Jewels or Star coins and grants 30.000 EXP to one Kamihime. Arcanum of Universe costs 1 Draconic Eye and grants 300.000 EXP.
The level limits of the various rarities are as follows:
| Rarity | Base Level Limit | Extra Available Levels per Star | Number of Available Stars | Maximum Level | Number of Available Harem Scenes |
|---|---|---|---|---|---|
| 20 | 10 | 3 | 50 | 2 | |
| 30 | 10 | 4 | 70 | 3 | |
| 40 | 10 | 4 | 80 | 3 | |
| 40 | 10 | 4 | 80 | 2 |
Note that Kamihime involved in the Main Story may have a number of additional Harem Scenes under the Main Story. That number is applicable only to the specific Story Kamihime.
Awakening
Awakening a Kamihime unleashes their full potential by increasing their base stats, maximum stats, burst attack and improving their abilities. In order to awaken a Kamihime she needs to be level 80 and all of her episodes must be cleared. This process requires three Draconic Eyes. Once awakened, she will revert to level 1 and gain new episodes.
Limit Break
Limit Break is the process of increasing the level cap of your Kamihime. The number of breaks and the requirements for breaking the limit depends on the Rarity of your Kamihime: Rare Kamihime can have their limit broken up to 3 times, while SR, SSR and Awakened Kamihime can have their limit broken up to 4 times. The number of golden stars on a Kamihime's icon indicates the number of limit breaks done for that Kamihime.
Materials
In general, Kamihime require a mix of the following materials to have their limit broken:
| Type | Icon | Obtained from |
|---|---|---|
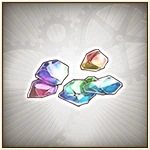
| Holy Stones | Tier 1 - |
|
| Tier 2 - | ||
| Tier 3 - | ||
| Tier 4 - | ||
| Dragon Bones | Tier 1 - |
|
| Tier 2 - | ||
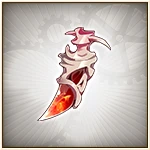
| Fangs | Tier 1 - |
|
| Lithographs/ Runes |
Tier 1 - |
|
| Tier 2 - | ||
| Tier 3 - | ||
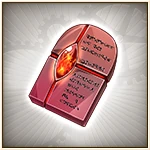
| Idea Cores | Tier 1 - |
|
| Tier 2 - | ||
| Grimoires | Tier 1 - |
|
| Tier 2 - |
Requirements
The requirements for Limit Breaking are based on the current limit break level of the Kamihime.
Note: Where any Elemental Material is concerned, only the Material corresponding to the Kamihime's element is required.
| Limit Break | Materials | Gems | ||||
|---|---|---|---|---|---|---|
| ★ ☆ ☆ |  1x Sacred Stone Shard |
 1x Dragon Bone |
 2x Lithographs |
200 | ||
| ★ ★ ☆ | 1x Sacred Stone Shard |
2x Dragon Bone |
3x Lithographs |
 1x Lithographs |
400 | |
| ★ ★ ★ |  2x Holy Jewel of Light |
3x Dragon Bone |
1x Lithographs |
 2x Runes |
 3x Idea Cores |
800 |
| Total | 2x Sacred Stone Shard |
2x Holy Jewel of Light |
6x Dragon Bone |
5x Lithographs |
2x Lithographs |
1.400 |
3x Idea Cores |
||||||
| Limit Break | Materials | Gems | ||||
|---|---|---|---|---|---|---|
| ★ ☆ ☆ ☆ | 1x Sacred Stone Shard |
1x Dragon Bone |
2x Lithographs |
1x Lithographs |
500 | |
| ★ ★ ☆ ☆ | 2x Holy Jewel of Light |
 1x Holy Crystal of Light |
 1x Dragon Bone |
2x Lithographs |
1x Runes |
1.000 |
| ★ ★ ★ ☆ | 2x Holy Crystal of Light |
2x Dragon Bone |
 1x Fang |
2x Runes |
3x Idea Cores |
2.000 |
| ★ ★ ★ ★ |  3x Holy Star of Light |
 5x Evolved Grimoire |
 3x Idea Cores |
10.000 | ||
| Total | 1x Sacred Stone Shard |
2x Holy Jewel of Light |
3x Holy Crystal of Light |
3x Holy Star of Light |
1x Dragon Bone |
27.000 |
3x Dragon Bone |
1x Fangs |
2x Lithographs |
3x Lithographs |
3x Runes | ||
3x Idea Cores |
3x Idea Cores |
5x Evolved Grimoire |
||||
| Limit Break | Materials | Gems | ||||
|---|---|---|---|---|---|---|
| ★ ☆ ☆ ☆ | 1x Holy Crystal of Light |
1x Dragon Bone |
2x Lithographs |
1.000 | ||
| ★ ★ ☆ ☆ | 3x Holy Crystal of Light |
1x Dragon Bone |
1x Fang |
1x Runes |
5x Idea Cores |
2.000 |
| ★ ★ ★ ☆ | 3x Holy Star of Light |
2x Dragon Bone |
2x Fangs |
3x Runes |
3x Idea Cores |
4.000 |
| ★ ★ ★ ★ | 3x Dragon Bone |
5x Idea Cores |
 5x Grimoire of Apotheosis |
20.000 | ||
| Total | 4x Holy Crystal of Light |
3x Holy Star of Light |
7x Dragon Bone |
3x Fangs |
2x Lithographs |
27.000 |
4x Runes |
5x Idea Cores |
8x Idea Cores |
5x Grimoire of Apotheosis |
|||
| Limit Break | Materials | Gems | ||||
|---|---|---|---|---|---|---|
| ★ ☆ ☆ ☆ | 2x Holy Crystal of Light |
3x Dragon Bone |
1x Fang |
3x Lithographs |
10.000 | |
| ★ ★ ☆ ☆ | 5x Holy Crystal of Light |
4x Dragon Bone |
1x Fang |
3x Runes |
5x Idea Cores |
20.000 |
| ★ ★ ★ ☆ | 5x Holy Star of Light |
2x Fangs |
5x Runes |
5x Idea Cores |
1x Evolved Grimoire |
40.000 |
| ★ ★ ★ ★ | 3x Fangs |
5x Idea Cores |
2x Evolved Grimoire |
6x Grimoire of Apotheosis |
200.000 | |
| Total | 7x Holy Crystal of Light |
5x Holy Star of Light |
7x Dragon Bone |
7x Fangs |
3x Lithographs |
270.000 |
8x Runes |
5x Idea Cores |
10x Idea Cores |
3x Evolved Grimoire |
6x Grimoire of Apotheosis | ||
| Total (Including SSR) |
11x Holy Crystal of Light |
8x Holy Star of Light |
14x Dragon Bone |
10x Fangs |
5x Lithographs |
297.000 |
12x Runes |
10x Idea Cores |
18x Idea Cores |
3x Evolved Grimoire |
11x Grimoire of Apotheosis | ||
List
Tip: Hold shift to sort multiple columns. The article has become too complex and we can't render the component in this place. Reduce the size of this article to display all components.