(Adding categories) Tag: categoryselect |
(Updated some wording) Tags: Visual edit apiedit |
||
| Line 5: | Line 5: | ||
== Types == |
== Types == |
||
Kamihime can have one of the five available types: |
Kamihime can have one of the five available types: |
||
| − | * {{Type|Offense}} - Offense Kamihime have the highest damage output. Usually they're capable of buffing their own damage or |
+ | * {{Type|Offense}} - Offense Kamihime have the highest damage output. Usually they're capable of buffing their own damage or loweing enemies' defenses. They have high ATK but low HP. |
* {{Type|Defense}} - With abilities to help mitigate damage, these Kamihime have higher survivability at the cost of lower damage. They have high HP and low ATK. |
* {{Type|Defense}} - With abilities to help mitigate damage, these Kamihime have higher survivability at the cost of lower damage. They have high HP and low ATK. |
||
| − | * {{Type|Balance}} - They're a mix between Offense and Defense. |
+ | * {{Type|Balance}} - They're a mix between Offense and Defense. Their kit has both offensive and defensive abilities. |
| − | * {{Type|Healer}} - Healers have abilities that restore HP to allies and/or cure afflictions. Overall, they can increase the party survivability |
+ | * {{Type|Healer}} - Healers have abilities that restore HP to allies and/or cure afflictions. Overall, they can increase the party survivability but, unlike Defense Kamihime, are incapable of preventing burst damage (e.g: enemy [[Combat_Mechanics#Overdive|Overdrive]]). |
| − | * {{Type|Tricky}} - They can help control the fight |
+ | * {{Type|Tricky}} - They can help control the fight either by debuffing enemies, applying negative statuses to enemies or by buffing allies. |
== Abilities == |
== Abilities == |
||
| − | Kamihime gain abilities |
+ | Kamihime gain abilities as certain conditions are met, as detailed in the table below. Some abilities are entirely new skills not available before and some are upgrades to basic skills that they are already able to use at lower levels - or upgrades to the new abilities. New abilities must be acquired by viewing scenes via the [[Harem]] system which are unlocked at the levels stated below. Ability upgrades are automatically applied when the Kamihime reaches the level threshold. |
Abilities are divided into three categories: Burst Abilities, Active Abilities and Assist Abilities (Passives). |
Abilities are divided into three categories: Burst Abilities, Active Abilities and Assist Abilities (Passives). |
||
| Line 19: | Line 19: | ||
*Assist Abilities are always active as long as the Kamihime is in the active Party and their effects apply to the whole party. Members in the reserve (slots 6 and 7) will NOT affect the active party (slots 1 to 5) with their Assist Abilities. |
*Assist Abilities are always active as long as the Kamihime is in the active Party and their effects apply to the whole party. Members in the reserve (slots 6 and 7) will NOT affect the active party (slots 1 to 5) with their Assist Abilities. |
||
| − | {| class="wikitable |
+ | {| class="wikitable" style="text-align:center;" align="center" |
|- |
|- |
||
| − | | colspan=13 |'''Kamihime Abilities''' |
+ | | colspan="13" |'''Kamihime Abilities''' |
|- |
|- |
||
! Rarity !! Requirement !!Effect |
! Rarity !! Requirement !!Effect |
||
|- |
|- |
||
| − | | rowspan=4| {{Icon|r}} || Basic ||Moderate Burst, one Active Ability |
+ | | rowspan="4" | {{Icon|r}} || Basic ||Moderate Burst, one Active Ability |
|- |
|- |
||
| Level 25 (★ ☆ ☆) || Second Active Ability available through [[Harem]] |
| Level 25 (★ ☆ ☆) || Second Active Ability available through [[Harem]] |
||
| Line 31: | Line 31: | ||
| ★ ★ ☆ (current level irrelevant) || Burst damage increased |
| ★ ★ ☆ (current level irrelevant) || Burst damage increased |
||
|- |
|- |
||
| − | | Level 45 (★★★) ||First Active Ability improved |
+ | | Level 45 (★★★) ||First Active Ability improved |
|- |
|- |
||
| − | | rowspan=6| {{Icon|sr}} || Basic || High Burst, two Active Abilities, one Assist Ability |
+ | | rowspan="6" | {{Icon|sr}} || Basic || High Burst, two Active Abilities, one Assist Ability |
|- |
|- |
||
|Level 35 (★ ☆ ☆ ☆) ||Third Active Ability available through [[Harem]] |
|Level 35 (★ ☆ ☆ ☆) ||Third Active Ability available through [[Harem]] |
||
|- |
|- |
||
| − | |Level 45 (★ ★ ☆ ☆) ||First Active Ability improved |
+ | |Level 45 (★ ★ ☆ ☆) ||First Active Ability improved |
|- |
|- |
||
|★ ★ ★ ☆ (current level irrelevant) ||Burst damage increased |
|★ ★ ★ ☆ (current level irrelevant) ||Burst damage increased |
||
|- |
|- |
||
| − | | Level 55 (★ ★ ★ ☆) ||Second [[Harem]] episode available |
+ | | Level 55 (★ ★ ★ ☆) ||Second [[Harem]] episode available, rewarding Magic Jewels |
|- |
|- |
||
| Level 65 (★ ★ ★ ★) ||Second Active Ability improved. |
| Level 65 (★ ★ ★ ★) ||Second Active Ability improved. |
||
|- |
|- |
||
| − | | rowspan=6 | {{Icon|ssr}}|| Basic || Extreme Burst, two Active Abilities, one Assist Ability |
+ | | rowspan="6" | {{Icon|ssr}}|| Basic || Extreme Burst, two Active Abilities, one Assist Ability |
|- |
|- |
||
| Level 45 (★ ☆ ☆ ☆) || Third Active Ability available through [[Harem]] |
| Level 45 (★ ☆ ☆ ☆) || Third Active Ability available through [[Harem]] |
||
|- |
|- |
||
| − | | Level 55 (★ ★ ☆ ☆) ||First Active Ability improved |
+ | | Level 55 (★ ★ ☆ ☆) ||First Active Ability improved |
|- |
|- |
||
| ★ ★ ★ ☆ (current level irrelevant) ||Burst damage increased |
| ★ ★ ★ ☆ (current level irrelevant) ||Burst damage increased |
||
|- |
|- |
||
| − | | Level 65 (★ ★ ★ ☆) ||Second [[Harem]] episode available |
+ | | Level 65 (★ ★ ★ ☆) ||Second [[Harem]] episode available, rewarding Magic Jewels |
|- |
|- |
||
| − | | Level 75 (★ ★ ★ ★) ||Second Active Ability improved |
+ | | Level 75 (★ ★ ★ ★) ||Second Active Ability improved |
|} |
|} |
||
== Enhancing == |
== Enhancing == |
||
=== Level === |
=== Level === |
||
| − | Kamihime can be enhanced in two ways - using them in battle will allocate EXP to them if they are in the active team |
+ | Kamihime can be enhanced in two ways - using them in battle will allocate EXP to them if they are in the active team and enhancing them with weapons will allocate EXP to them outside of battle. |
| − | Since the player will normally obtain more EXP than is required and will have multiple Kamihime stuck at their level caps |
+ | Since the player will normally obtain more EXP than is required and will have multiple Kamihime stuck at their level caps using weapons to upgrade them is '''not''' recommended unless transferring their [[Enhance#Orange_Bonuses|orange bonuses]]. |
The level limits of the various rarities are as follows: |
The level limits of the various rarities are as follows: |
||
| − | {| class="wikitable" |
+ | {| class="wikitable" style="text-align:center;" cellspacing="1" cellpadding="1" border="1" |
|- |
|- |
||
| − | ! Rarity !! Base Limit !! |
+ | ! Rarity !! Base Level Limit !! Extra Available Levels per Star !! Number of Available Stars !! Maximum Level !!Number of Available Harem Scenes |
|- |
|- |
||
| {{Icon|r}} || 20 || 10 || 3 || 50 || 2 |
| {{Icon|r}} || 20 || 10 || 3 || 50 || 2 |
||
| Line 76: | Line 76: | ||
|} |
|} |
||
| − | Note that Kamihime involved in the Main Story may have any number of additional Harem Scenes under the Main Story. These numbers cover only those under the |
+ | Note that Kamihime involved in the Main Story may have any number of additional Harem Scenes under the Main Story. These numbers cover only those under the Kamihime themselves. |
=== Limit Break Materials === |
=== Limit Break Materials === |
||
| − | The requirements of Limit Breaking are based on the |
+ | The requirements of Limit Breaking are based on the current limit break level of the Kamihime. In general Kamihime require a mix of the following materials: |
{| class="wikitable" style="width:100%;" |
{| class="wikitable" style="width:100%;" |
||
! style="width:10%;" | Type |
! style="width:10%;" | Type |
||
| Line 85: | Line 85: | ||
! style="width:50%;" | Obtained from |
! style="width:50%;" | Obtained from |
||
|- |
|- |
||
| − | | |
+ | | rowspan="4" align="center" | Holy Stones |
| '''Tier 1''' - [[File:Sacred Stone Shard.jpg|35px]] |
| '''Tier 1''' - [[File:Sacred Stone Shard.jpg|35px]] |
||
| rowspan="4" | |
| rowspan="4" | |
||
| + | *All tiers can be obtained from daily SPs quests (except Sunday). Higher difficulty SP quests will have better odds of dropping higher tier materials |
||
| − | *Non-elemental |
||
| − | * |
+ | * Tier 1 can also be obtained from daily quests |
| − | * Tier |
+ | * Tier 2 can also be obtained from weekly quests |
| − | * Tier 2-4 are also available |
+ | * Tier 2-4 are also available in the Exchange Shop |
|- |
|- |
||
| '''Tier 2''' - [[File:Holy Jewel of Light.jpg|35px]] |
| '''Tier 2''' - [[File:Holy Jewel of Light.jpg|35px]] |
||
| Line 99: | Line 99: | ||
| '''Tier 4''' - [[File:Holy Star of Light.jpg|35px]] |
| '''Tier 4''' - [[File:Holy Star of Light.jpg|35px]] |
||
|- |
|- |
||
| − | | |
+ | | rowspan="2" align="center" | Dragon Bones |
| '''Tier 1''' - [[File:Dragon Bone of Fire.jpg|35px]][[File:Dragon Bone of Water.jpg|35px]][[File:Dragon Bone of Lightning.jpg|35px]][[File:Dragon Bone of Wind.jpg|35px]][[File:Dragon Bone of Light.jpg|35px]][[File:Dragon Bone of Darkness.jpg|35px]] |
| '''Tier 1''' - [[File:Dragon Bone of Fire.jpg|35px]][[File:Dragon Bone of Water.jpg|35px]][[File:Dragon Bone of Lightning.jpg|35px]][[File:Dragon Bone of Wind.jpg|35px]][[File:Dragon Bone of Light.jpg|35px]][[File:Dragon Bone of Darkness.jpg|35px]] |
||
| rowspan="2" | |
| rowspan="2" | |
||
| ⚫ | |||
| − | * Non-elemental |
||
| ⚫ | |||
| − | * Corresponds to the element of the Kamihime. |
||
| ⚫ | |||
| ⚫ | |||
|- |
|- |
||
|'''Tier 2''' - [[File:Dragon Bone of Heliolatry.jpg|35px]][[File:Dragon Bone of Ice.jpg|35px]][[File:Dragon Bone of Thunder.jpg|35px]][[File:Dragon Bone of Fluttering Verdancy.jpg|35px]][[File:Dragon Bone of Flashing Light.jpg|35px]][[File:Dragon Bone of Obsidian.jpg|35px]] |
|'''Tier 2''' - [[File:Dragon Bone of Heliolatry.jpg|35px]][[File:Dragon Bone of Ice.jpg|35px]][[File:Dragon Bone of Thunder.jpg|35px]][[File:Dragon Bone of Fluttering Verdancy.jpg|35px]][[File:Dragon Bone of Flashing Light.jpg|35px]][[File:Dragon Bone of Obsidian.jpg|35px]] |
||
| Line 112: | Line 110: | ||
| '''Tier 1''' - [[File:Corona Fang.jpg|35px]][[File:Frost Fang.jpg|35px]][[File:Electric Fang.jpg|35px]][[File:Gale Fang.jpg|35px]][[File:Luminous Fang.jpg|35px]][[File:Chaos Fang.jpg|35px]] |
| '''Tier 1''' - [[File:Corona Fang.jpg|35px]][[File:Frost Fang.jpg|35px]][[File:Electric Fang.jpg|35px]][[File:Gale Fang.jpg|35px]][[File:Luminous Fang.jpg|35px]][[File:Chaos Fang.jpg|35px]] |
||
| |
| |
||
| − | * Rare drop from Standard and Expert SP quests |
+ | * Rare drop from Standard and Expert SP quests of the corresponding element |
|- |
|- |
||
| − | | |
+ | | rowspan="3" align="center" | Lithographs/<br />Runes |
| − | | '''Tier 1''' - [[File:Lithograph of Fire.jpg|35px]][[File:Lithograph of Water.jpg|35px]] |
+ | | '''Tier 1''' - [[File:Lithograph of Fire.jpg|35px]][[File:Lithograph of Water.jpg|35px]][[File:Lithograph of Lightning.jpg|35px]][[File:Lithograph of Wind.jpg|35px]][[File:Lithograph of Light.jpg|35px]][[File:Lithograph of Darkness.jpg|35px]] |
| rowspan="3" | |
| rowspan="3" | |
||
| ⚫ | |||
| − | *Corresponds to the element of the Kamihime |
||
| ⚫ | |||
| ⚫ | |||
| ⚫ | |||
|- |
|- |
||
| − | |'''Tier 2''' - [[File:Lithograph of Scorching Heat.jpg|35px]][[File:Lithograph of Ice.jpg|35px]] |
+ | |'''Tier 2''' - [[File:Lithograph of Scorching Heat.jpg|35px]][[File:Lithograph of Ice.jpg|35px]][[File:Lithograph of Electrical Lightning.jpg|35px]][[File:Lithograph of Raging Wind.jpg|35px]][[File:Lithograph of Holy Light.jpg|35px]][[File:Lithograph of the Abyss.jpg|35px]] |
|- |
|- |
||
| − | |'''Tier 3''' - [[File:Flame Rune.jpg|35px]][[File:Frozen Rune.jpg|35px]] |
+ | |'''Tier 3''' - [[File:Flame Rune.jpg|35px]][[File:Frozen Rune.jpg|35px]][[File:Lightning Rune.jpg|35px]][[File:Cyclone Rune.jpg|35px]][[File:Luminous Rune.jpg|35px]][[File:Rune of Darkness.jpg|35px]] |
|- |
|- |
||
| − | | |
+ | | rowspan="2" align="center" | Idea Cores |
| − | | '''Tier 1''' - [[File:Blazing Idea Core.jpg|35px]][[File:Frozen Idea Core.jpg|35px]] |
+ | | '''Tier 1''' - [[File:Blazing Idea Core.jpg|35px]][[File:Frozen Idea Core.jpg|35px]][[File:Electric Idea Core.jpg|35px]][[File:Howling Idea Core.jpg|35px]][[File:Flashing Light Idea Core.jpg|35px]][[File:Dark Idea Core.jpg|35px]] |
| rowspan="2" | |
| rowspan="2" | |
||
| ⚫ | |||
| − | * Corresponds to the element of the Kamihime |
||
| ⚫ | |||
** Tier 1 drops from both Standard and Expert Raids |
** Tier 1 drops from both Standard and Expert Raids |
||
** Tier 2 drops from Expert Raids only |
** Tier 2 drops from Expert Raids only |
||
|- |
|- |
||
| − | |'''Tier 2''' - [[File:Prison of Fire, Idea Core.jpg|35px]][[File:Prison of Ice, Idea Core.jpg|35px]] |
+ | |'''Tier 2''' - [[File:Prison of Fire, Idea Core.jpg|35px]][[File:Prison of Ice, Idea Core.jpg|35px]][[File:Prison of Lightning, Idea Core.jpg|35px]][[File:Prison of Wind, Idea Core.jpg|35px]][[File:Prison of Light, Idea Core.jpg|35px]][[File:Prison of Darkness, Idea Core.jpg|35px]] |
|- |
|- |
||
| rowspan="2" align="center" | Grimoires |
| rowspan="2" align="center" | Grimoires |
||
| '''Tier 1''' - [[File:Evolved Grimoire.jpg|35px]] |
| '''Tier 1''' - [[File:Evolved Grimoire.jpg|35px]] |
||
| rowspan="2" | |
| rowspan="2" | |
||
| − | * Non-elemental |
||
* Used only for the final Limit Break for SR and SSR rarities |
* Used only for the final Limit Break for SR and SSR rarities |
||
| − | ** Tier 1 used for SR |
+ | ** Tier 1 used for SR |
| + | ** Tier 2 used for SSR |
||
| − | * |
+ | *Obtained from Events '''ONLY''' |
|- |
|- |
||
|'''Tier 2''' - [[File:Grimoire of Apotheosis.jpg|35px]] |
|'''Tier 2''' - [[File:Grimoire of Apotheosis.jpg|35px]] |
||
|} |
|} |
||
| − | === |
+ | === Limit Break Requirements === |
| − | Note: Where any Elemental Material is concerned, only the Material corresponding to the element of the Kamihime will be |
+ | Note: Where any Elemental Material is concerned, only the Material corresponding to the element of the Kamihime will be required. |
| − | <div |
+ | <div style="width:80%;" align="center"> |
<tabber> |
<tabber> |
||
R = {| class="wikitable" align="center" style="width:100%;text-align:center;" |
R = {| class="wikitable" align="center" style="width:100%;text-align:center;" |
||
Revision as of 09:02, 28 August 2017

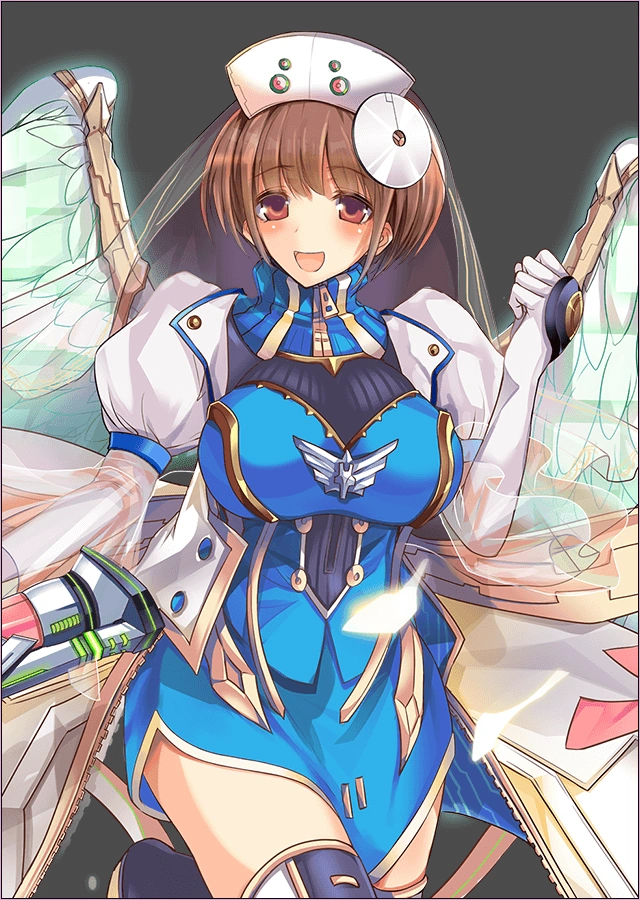
Nike - a caring and gentle Kamihime.
Kamihime are former humans that were able to obtain god-like powers. They possess strong magic and incredible power. Most of them lost their memories after Ragnarok and are now trying to prevent a second one.
Types
Kamihime can have one of the five available types:
 - Offense Kamihime have the highest damage output. Usually they're capable of buffing their own damage or loweing enemies' defenses. They have high ATK but low HP.
- - With abilities to help mitigate damage, these Kamihime have higher survivability at the cost of lower damage. They have high HP and low ATK.
- - They're a mix between Offense and Defense. Their kit has both offensive and defensive abilities.
- - Healers have abilities that restore HP to allies and/or cure afflictions. Overall, they can increase the party survivability but, unlike Defense Kamihime, are incapable of preventing burst damage (e.g: enemy Overdrive).
- - They can help control the fight either by debuffing enemies, applying negative statuses to enemies or by buffing allies.
Abilities
Kamihime gain abilities as certain conditions are met, as detailed in the table below. Some abilities are entirely new skills not available before and some are upgrades to basic skills that they are already able to use at lower levels - or upgrades to the new abilities. New abilities must be acquired by viewing scenes via the Harem system which are unlocked at the levels stated below. Ability upgrades are automatically applied when the Kamihime reaches the level threshold.
Abilities are divided into three categories: Burst Abilities, Active Abilities and Assist Abilities (Passives).
- Burst Abilities will be activated whenever the Kamihime uses a Burst when her Mode Gauge is at 100.
- Active Abilities can be activated at will by the player between attack turns and cost zero turns to activate, but will incur a cooldown until they can be used again.
- Assist Abilities are always active as long as the Kamihime is in the active Party and their effects apply to the whole party. Members in the reserve (slots 6 and 7) will NOT affect the active party (slots 1 to 5) with their Assist Abilities.
| Kamihime Abilities | ||||||||||||
| Rarity | Requirement | Effect | ||||||||||
|---|---|---|---|---|---|---|---|---|---|---|---|---|
| Basic | Moderate Burst, one Active Ability | |||||||||||
| Level 25 (★ ☆ ☆) | Second Active Ability available through Harem | |||||||||||
| ★ ★ ☆ (current level irrelevant) | Burst damage increased | |||||||||||
| Level 45 (★★★) | First Active Ability improved | |||||||||||
| Basic | High Burst, two Active Abilities, one Assist Ability | |||||||||||
| Level 35 (★ ☆ ☆ ☆) | Third Active Ability available through Harem | |||||||||||
| Level 45 (★ ★ ☆ ☆) | First Active Ability improved | |||||||||||
| ★ ★ ★ ☆ (current level irrelevant) | Burst damage increased | |||||||||||
| Level 55 (★ ★ ★ ☆) | Second Harem episode available, rewarding Magic Jewels | |||||||||||
| Level 65 (★ ★ ★ ★) | Second Active Ability improved. | |||||||||||
| Basic | Extreme Burst, two Active Abilities, one Assist Ability | |||||||||||
| Level 45 (★ ☆ ☆ ☆) | Third Active Ability available through Harem | |||||||||||
| Level 55 (★ ★ ☆ ☆) | First Active Ability improved | |||||||||||
| ★ ★ ★ ☆ (current level irrelevant) | Burst damage increased | |||||||||||
| Level 65 (★ ★ ★ ☆) | Second Harem episode available, rewarding Magic Jewels | |||||||||||
| Level 75 (★ ★ ★ ★) | Second Active Ability improved | |||||||||||
Enhancing
Level
Kamihime can be enhanced in two ways - using them in battle will allocate EXP to them if they are in the active team and enhancing them with weapons will allocate EXP to them outside of battle.
Since the player will normally obtain more EXP than is required and will have multiple Kamihime stuck at their level caps using weapons to upgrade them is not recommended unless transferring their orange bonuses.
The level limits of the various rarities are as follows:
| Rarity | Base Level Limit | Extra Available Levels per Star | Number of Available Stars | Maximum Level | Number of Available Harem Scenes |
|---|---|---|---|---|---|
| 20 | 10 | 3 | 50 | 2 | |
| 30 | 10 | 4 | 70 | 3 | |
| 40 | 10 | 4 | 80 | 3 |
Note that Kamihime involved in the Main Story may have any number of additional Harem Scenes under the Main Story. These numbers cover only those under the Kamihime themselves.
Limit Break Materials
The requirements of Limit Breaking are based on the current limit break level of the Kamihime. In general Kamihime require a mix of the following materials:
| Type | Icon | Obtained from |
|---|---|---|
| Holy Stones | Tier 1 - |
|
| Tier 2 - | ||
| Tier 3 - | ||
| Tier 4 - | ||
| Dragon Bones | Tier 1 - |
|
| Tier 2 - | ||
| Fangs | Tier 1 - |
|
| Lithographs/ Runes |
Tier 1 - |
|
| Tier 2 - | ||
| Tier 3 - | ||
| Idea Cores | Tier 1 - |
|
| Tier 2 - | ||
| Grimoires | Tier 1 - |
|
| Tier 2 - |
Limit Break Requirements
Note: Where any Elemental Material is concerned, only the Material corresponding to the element of the Kamihime will be required.
| Limit Break | Materials |
|---|---|
| ★ ☆ ☆ | 1x 1x |
| ★ ★ ☆ | 1x 2x |
| ★ ★ ★ | 2x 3x |
| Limit Break | Materials |
|---|---|
| ★ ☆ ☆ ☆ | 1x 1x |
| ★ ★ ☆ ☆ | 2x 1x |
| ★ ★ ★ ☆ | 2x 2x |
| ★ ★ ★ ★ | 3x 3x |
| Limit Break | Materials |
|---|---|
| ★ ☆ ☆ ☆ | 1x 1x |
| ★ ★ ☆ ☆ | 3x 1x |
| ★ ★ ★ ☆ | 3x 2x |
| ★ ★ ★ ★ | 5x 5x |
Kamihime List
R Kamihime and portraits will be added soon
Tip: Hold shift to sort multiple columns. The article has become too complex and we can't render the component in this place. Reduce the size of this article to display all components.